How to Bind Your Gokyō Shūmyō
Every once in a while I get a query if the Special Edition Gokyō Shūmyō is ‘still’ available – understandable, since it has been almost two years since the announcement post. Here’s then an update: the Special Edition is out of stock! That is to say, I print, bind and mail orders on demand, usually within 1–2 days. Since the Special Edition is in fact selling surprisingly well (I stopped counting at 50 copies), it will be available for purchase as long as I have access to my printer. For buying instructions, scroll to the end of this post.
Even though the Special Edition is completely handmade, binding included, I have so far not heard that any of the books had broken down or come loose. Still, this is bound (pun unintended) to happen sooner or later, and so in this post I’m writing instructions for how to re-bind the book should it become necessary. Or, if you want to have a unique copy with your own specially-coloured thread, now you can do that too. And, of course, the instructions are generisable, meaning that you can apply them to bind any book in the traditional Japanese way!
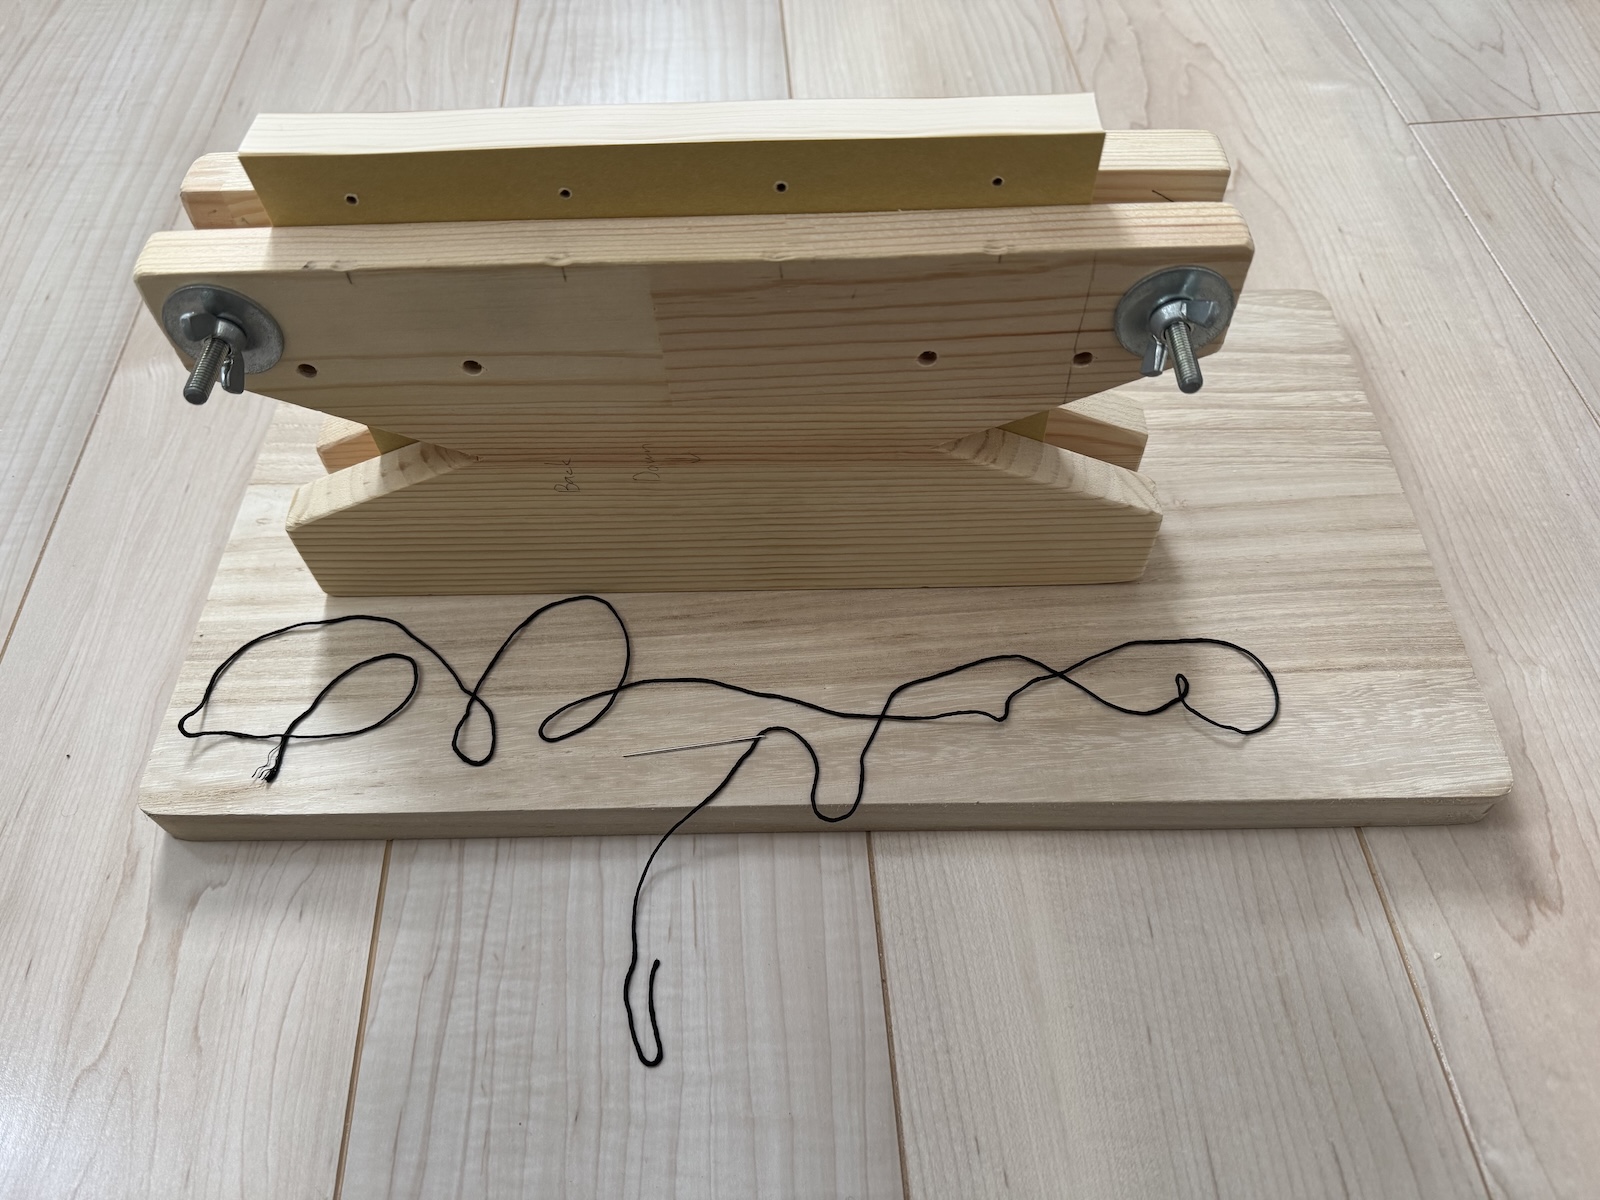
1) Starting point: a book with four drilled holes, pressed to prevent any pages from coming loose; roughly 1 metre of thread, and a needle. It helps to have as small a needle as possible, as long as you can pass the thread through it.
For the record, I’m using Japanese black silk thread. It’s a bit difficult to work with as it unravels easily, but I like how it looks on a finished book.
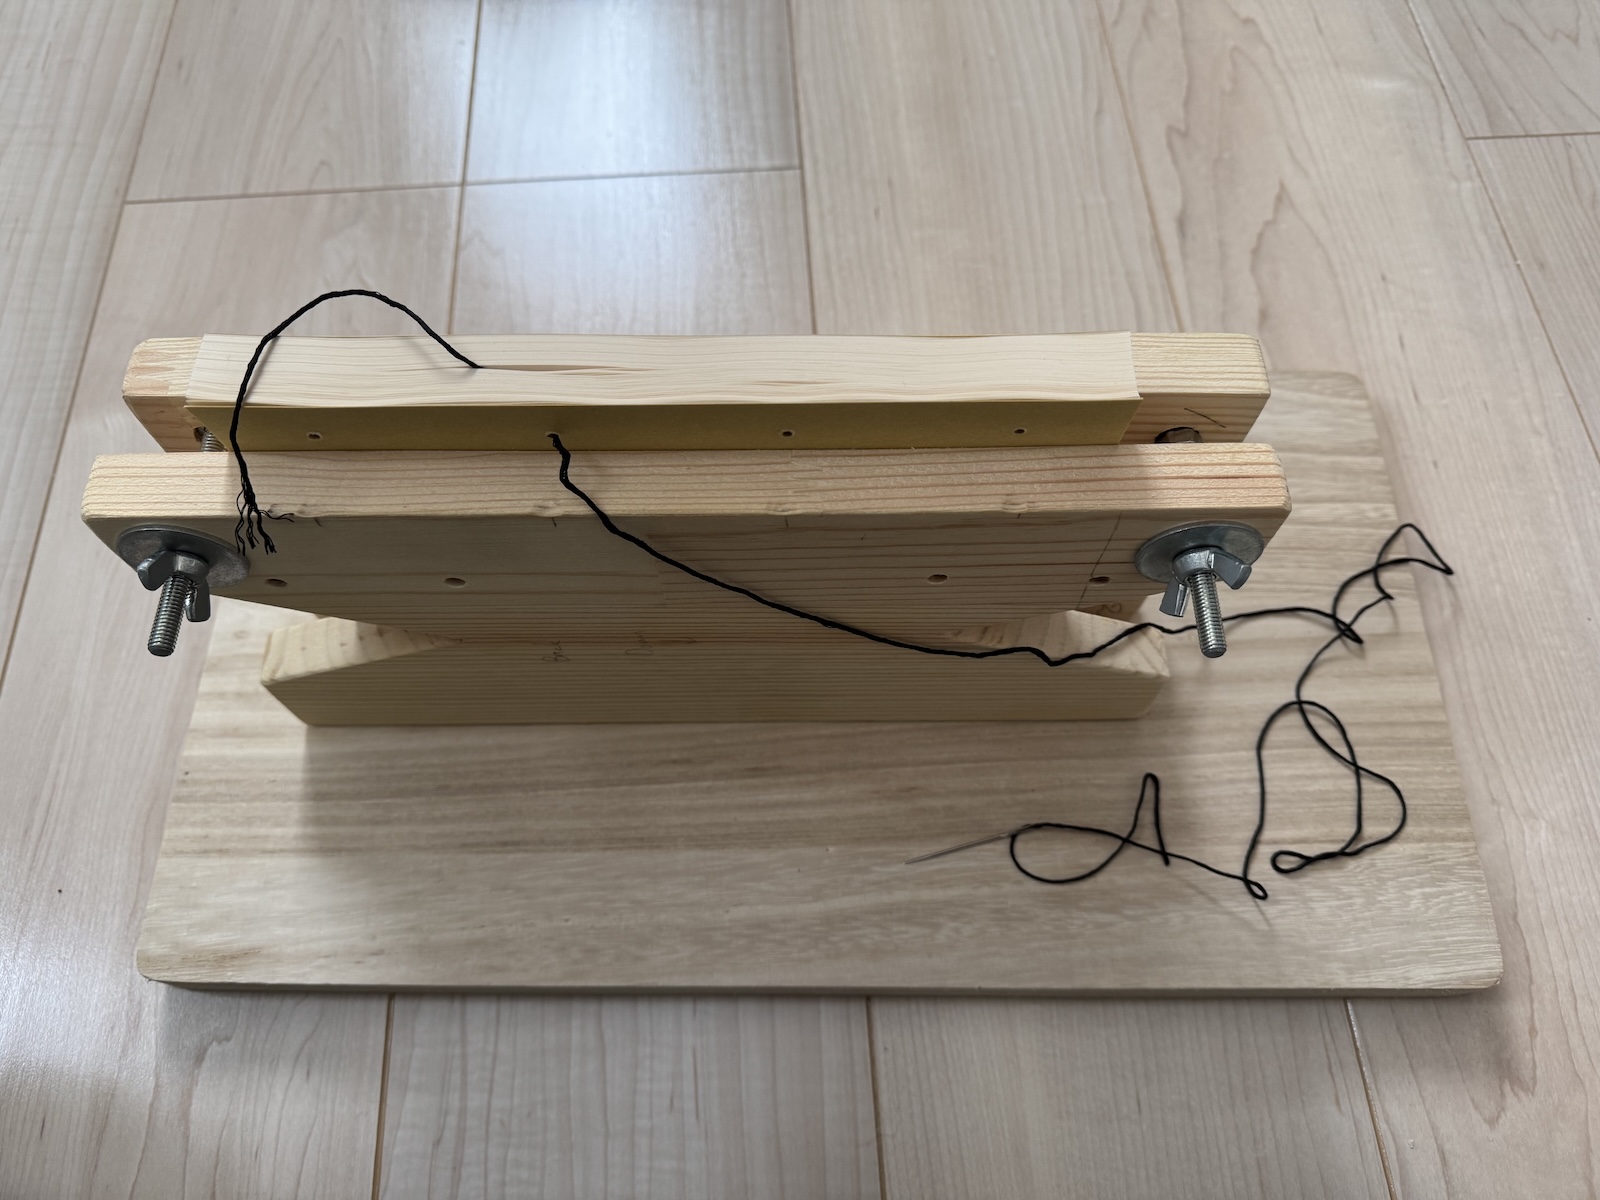
2) When I searched for guides on traditional Japanese binding, I found at times rather unhelpful advice, which is part of the reason why I’m posting my own version. For example, one guide said that when starting the binding, you’d ‘just push the needle through roughly half the pages’, which is very infeasible when you have 300 pages and the hole is far from the edges. In order to get here . . .
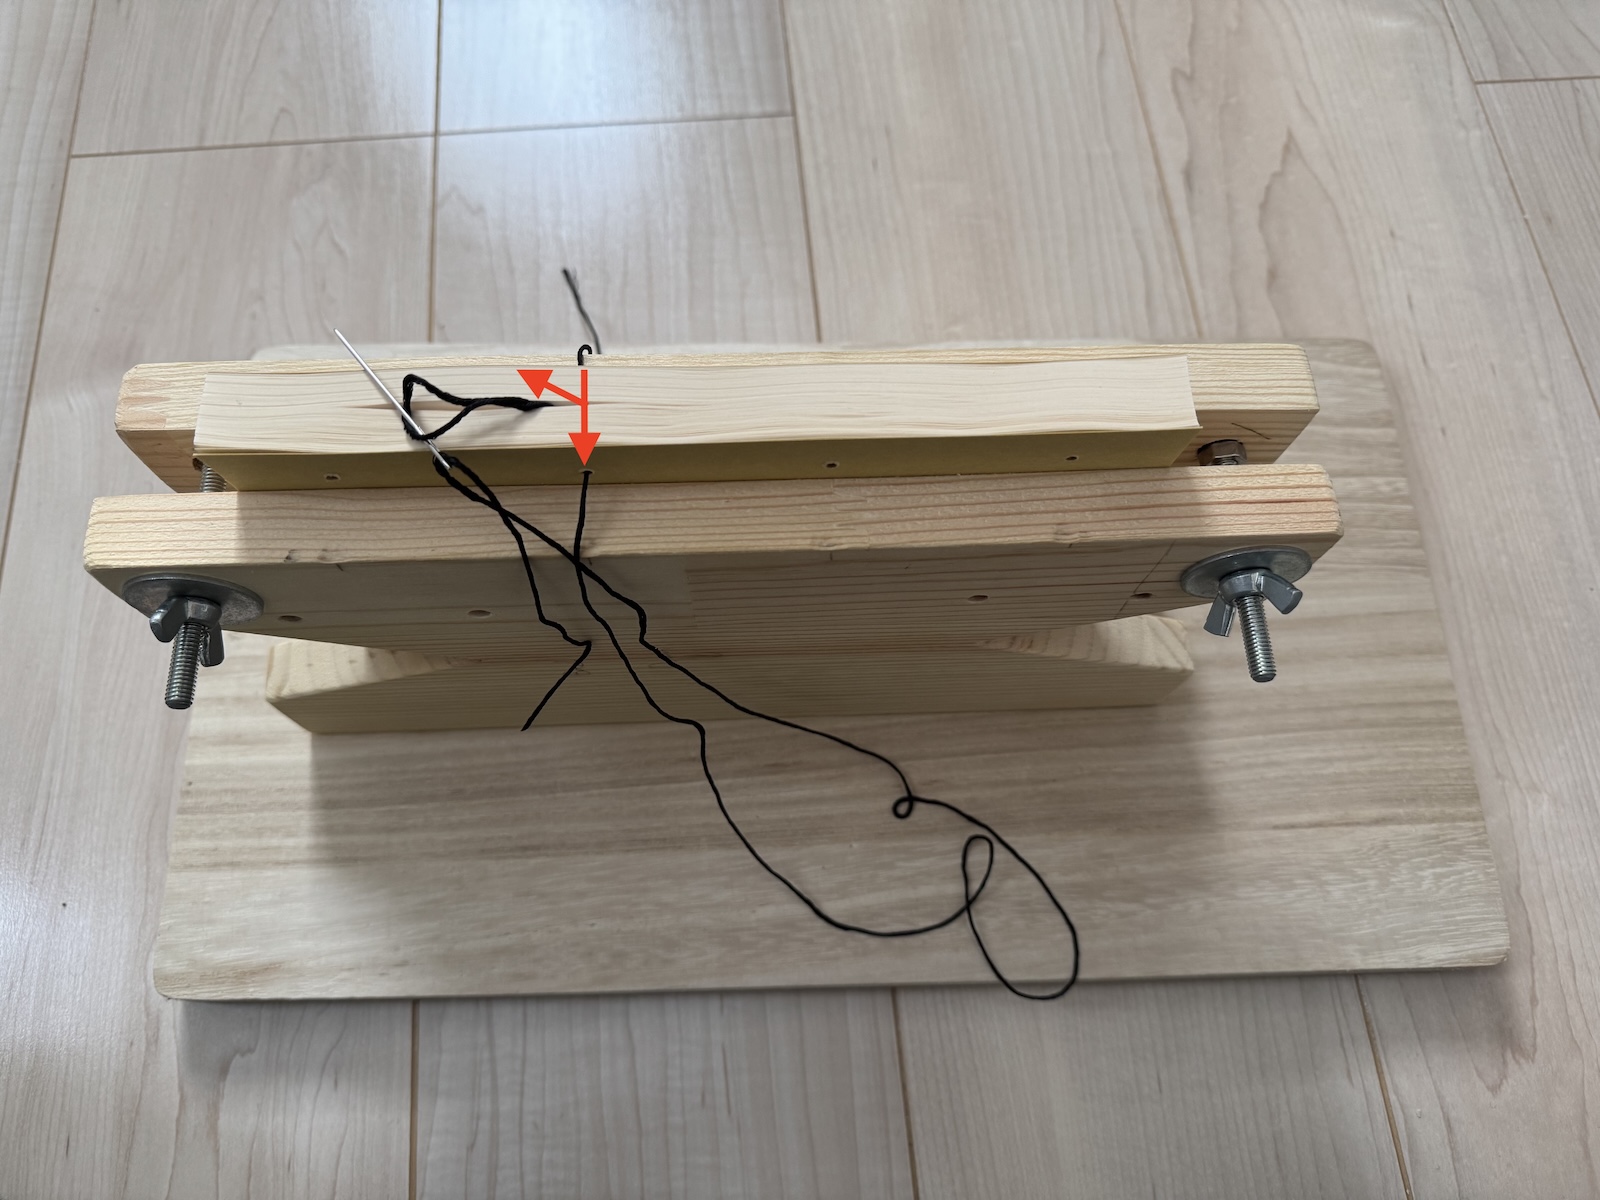
3). . . I found that we’ll have to push the needle and thread through all the pages, then slightly open the book from the middle, and use a tool (such as the needle we have at hand) to manually gouge out the back end of the thread. The precise location in the middle of the book doesn’t matter. I recommend leaving a ‘tail’ of some 10–15 centimeters; you will need enough that you can make 4–5 knots comfortably.
Incidentally, mathematicians would tell us that it doesn’t matter which hole you start the binding from, but I like to use one of the centre holes. This is because one end of the thread will be hidden along with a knot inside the book, and if it’s in the middle of the page rather than at one of the edge holes it will be less noticeable.

4) Next we make a loop around the edge of the book and drive the needle again through the same hole.
Be careful that you don’t drive the needle ‘through’ the existing thread, as this will later make it impossible to tighten the thread. You can check that the threads are separate by tugging at one of them, and checking if the other thread moves along with it.
At this stage we want to keep the thread rather loose, so don’t tighten it all the way. If we need to backtrack or fix something later, loose thread will be easier to work with.
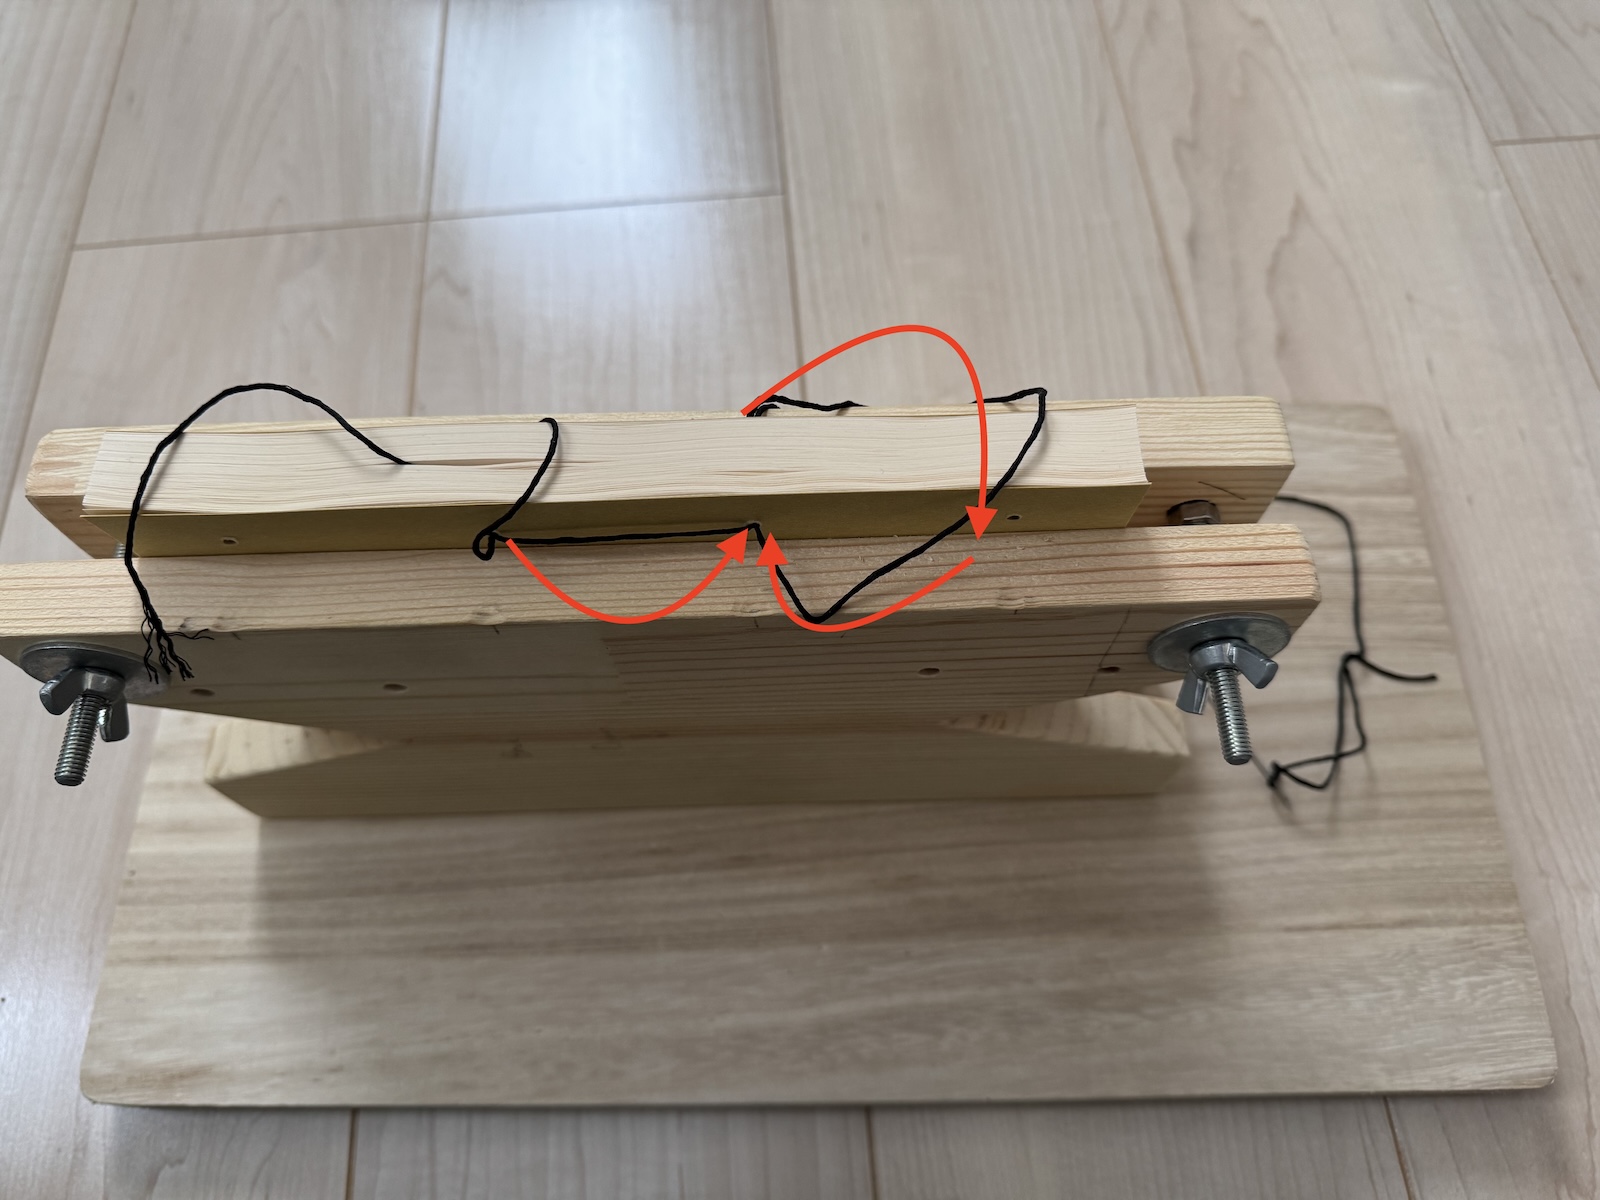
5) Next we go to the hole to the right, go through it, again make a loop along the edge, and again go through. Now we will be on the opposite side.
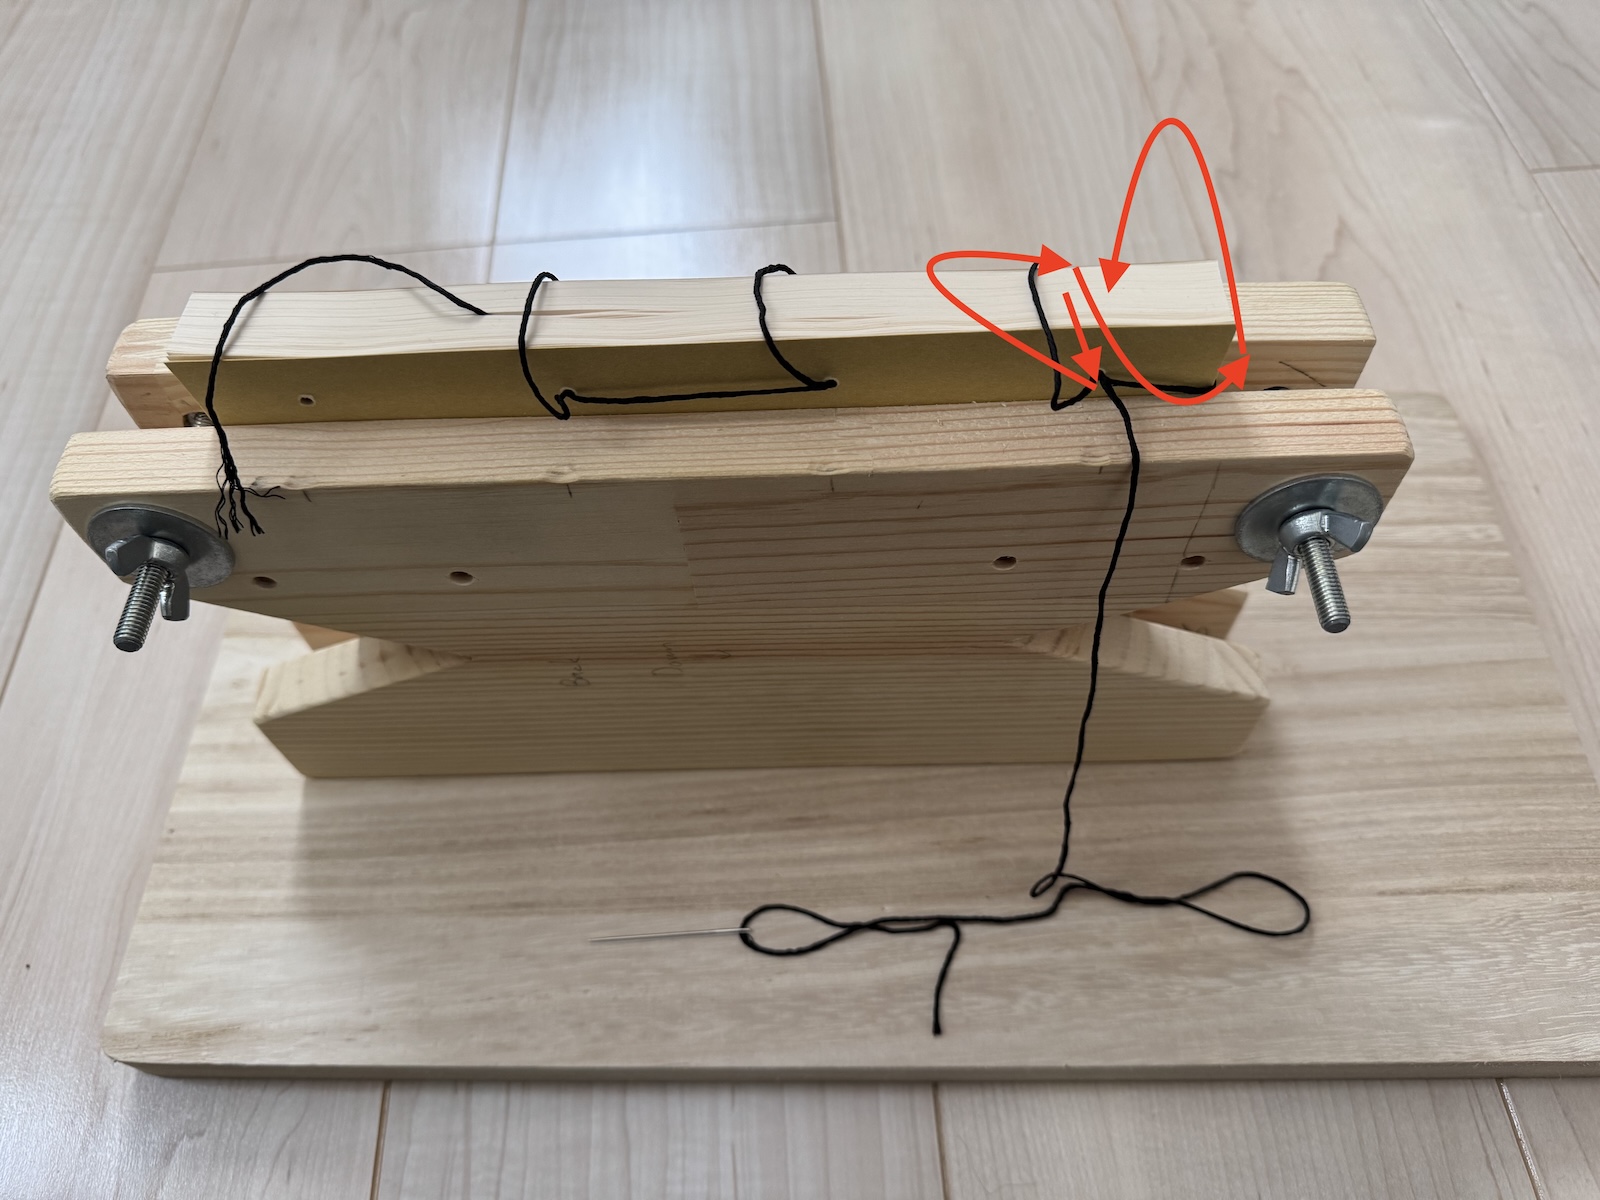
6) Next we come to the hole on the right-hand side. First we go through the hole, then make a loop along the upper edge, go through, then we make a loop along the right-hand side edge, and finally go through again. Now the needle will be on the viewer’s side of the book.
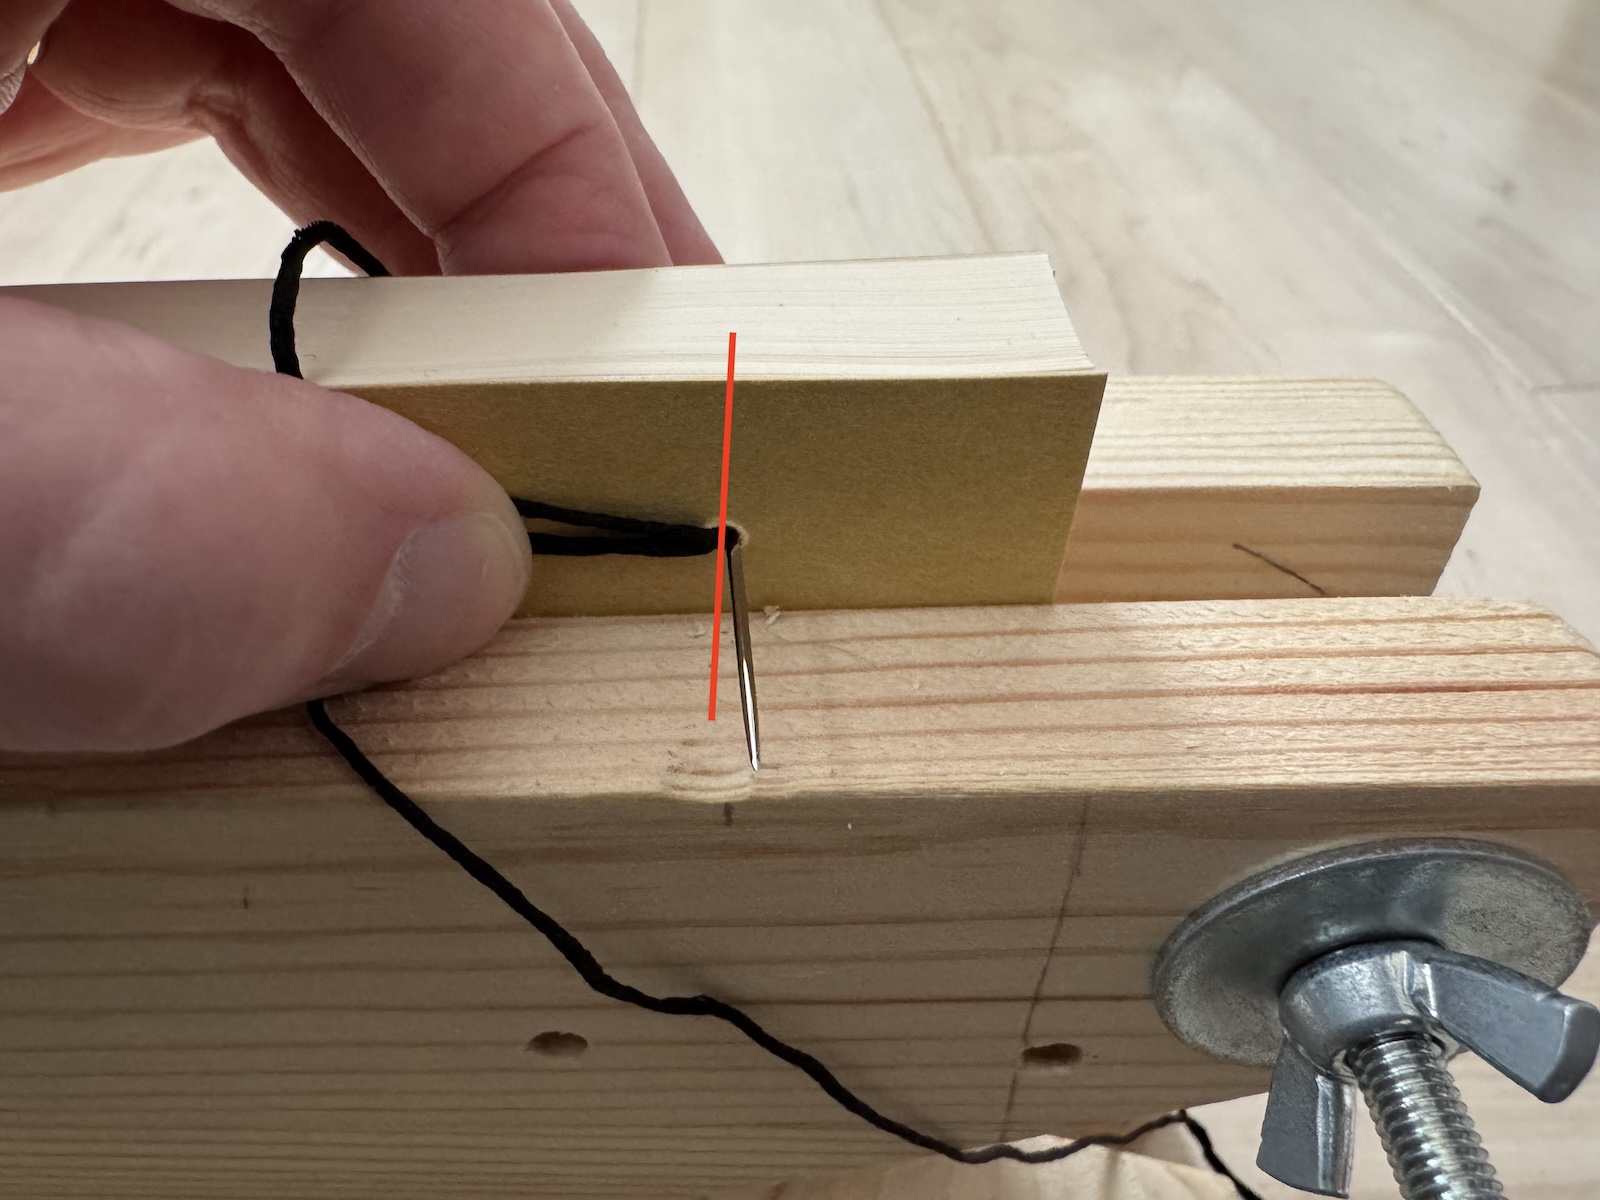
7) The side holes will become rather crowded because we have to go through three times. To make sure that we don’t accidentally push the needle through existing thread, I like to draw the existing thread to one side while pushing the needle through the other side, as shown above. Again, make sure to tug at the thread to double-check.
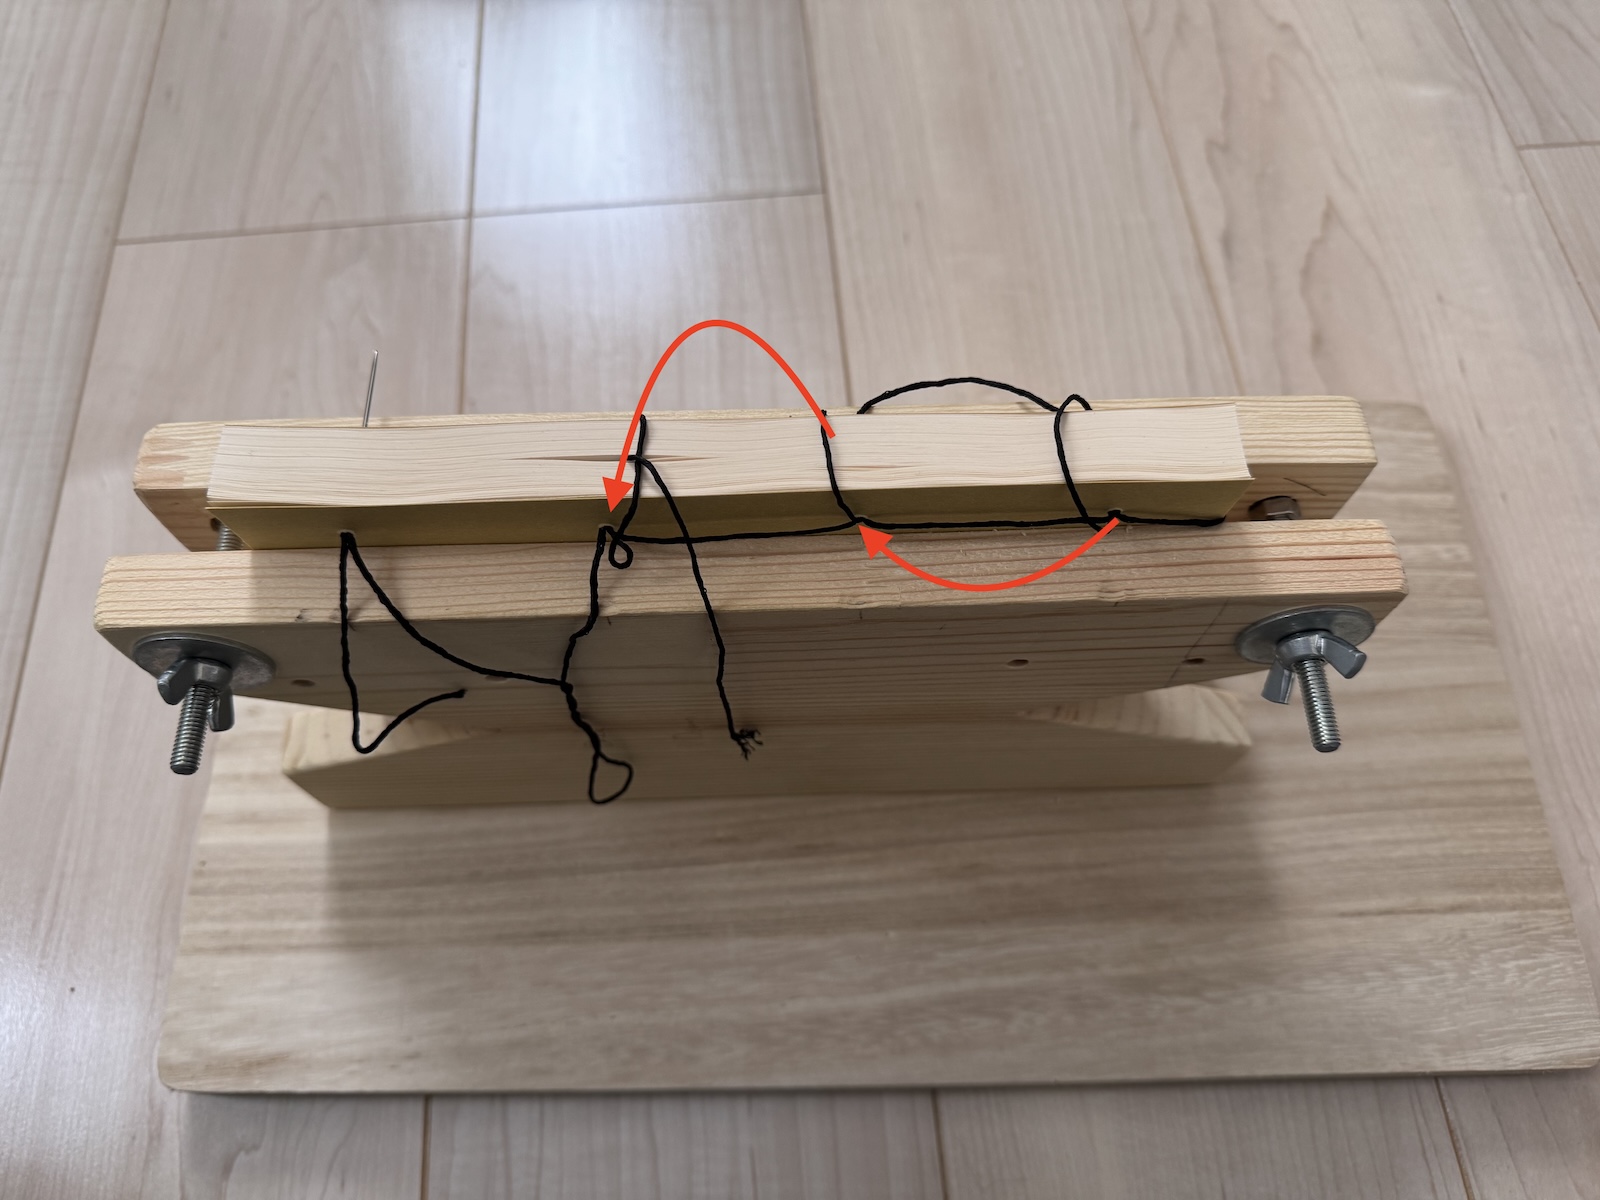
8) Next we zig-zag back to the starting point, and proceed to go to the other side hole.

9) And, again, we do the double loops for the side hole, one for each edge. In the end, the needle will be on the opposite side of the viewer.
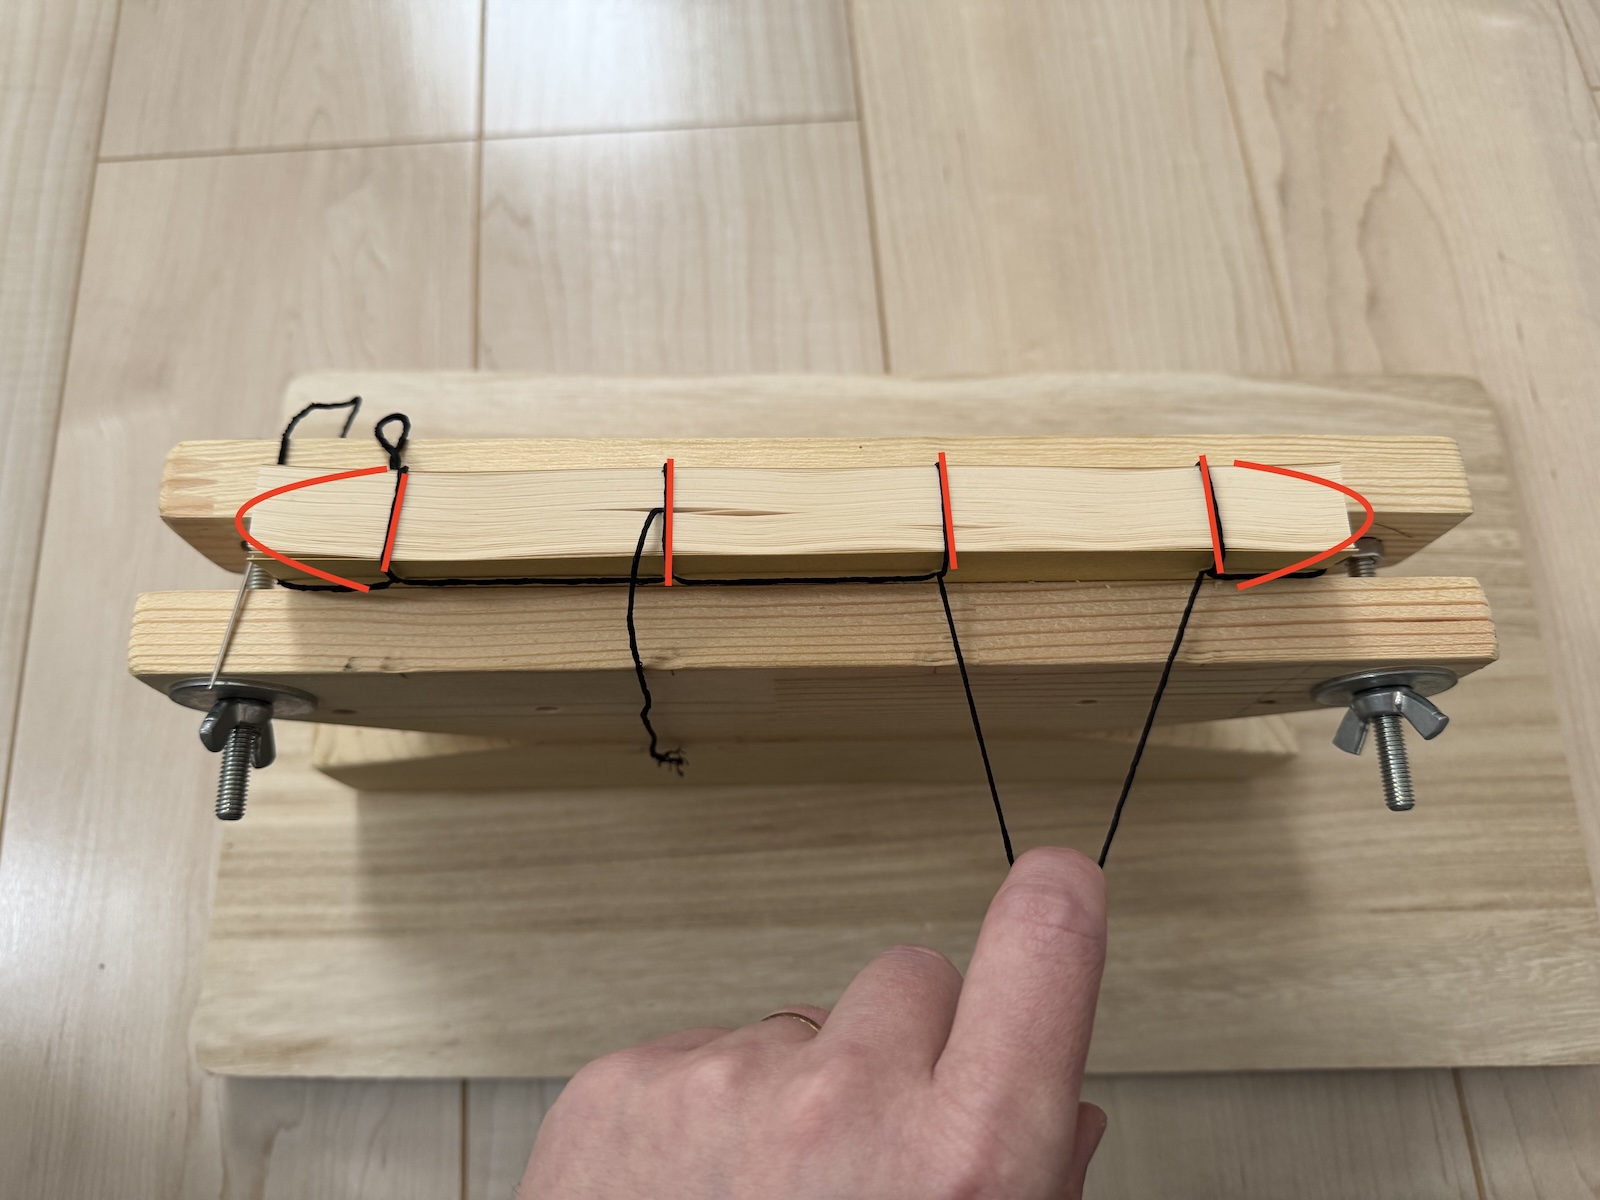
10) By this point you should be running low on thread, so it is time to tighten the loops to get more material to work with. There will be one more timing to tighten the thread later, so you don’t need to go all the way, but this is a good time to check that you haven’t accidentally gotten your thread tangled up with itself. If you find that there is a problem, you may need to backtrack and start from the beginning.
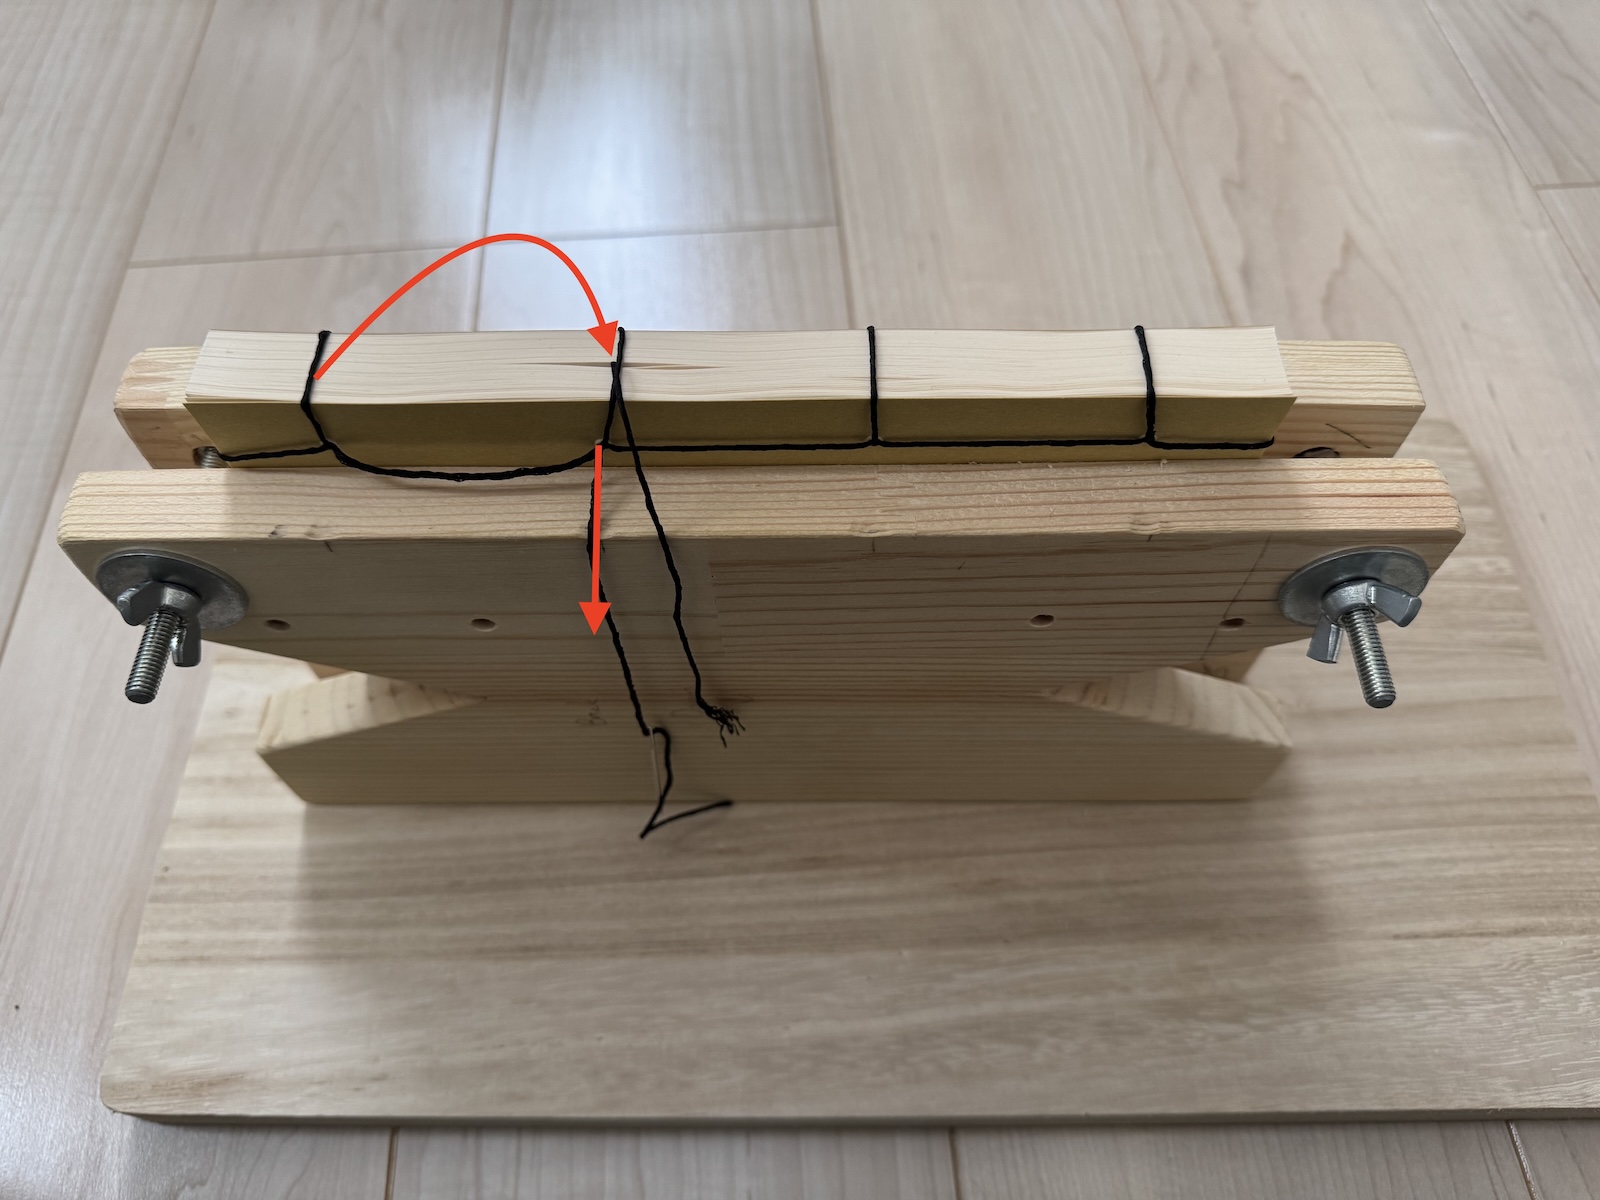
11) After you are sure that the thread isn’t tangled up, and you have somewhat tightened the loops, it is time to pass the needle one more time through the starting hole.

12) Now it is time to finish the other end of the thread. There was a complicated traditional Japanese way of making a bulky knot but I never got the hang of it no matter how hard I tried, so I suggest just doing a regular knot multiple times on itself.
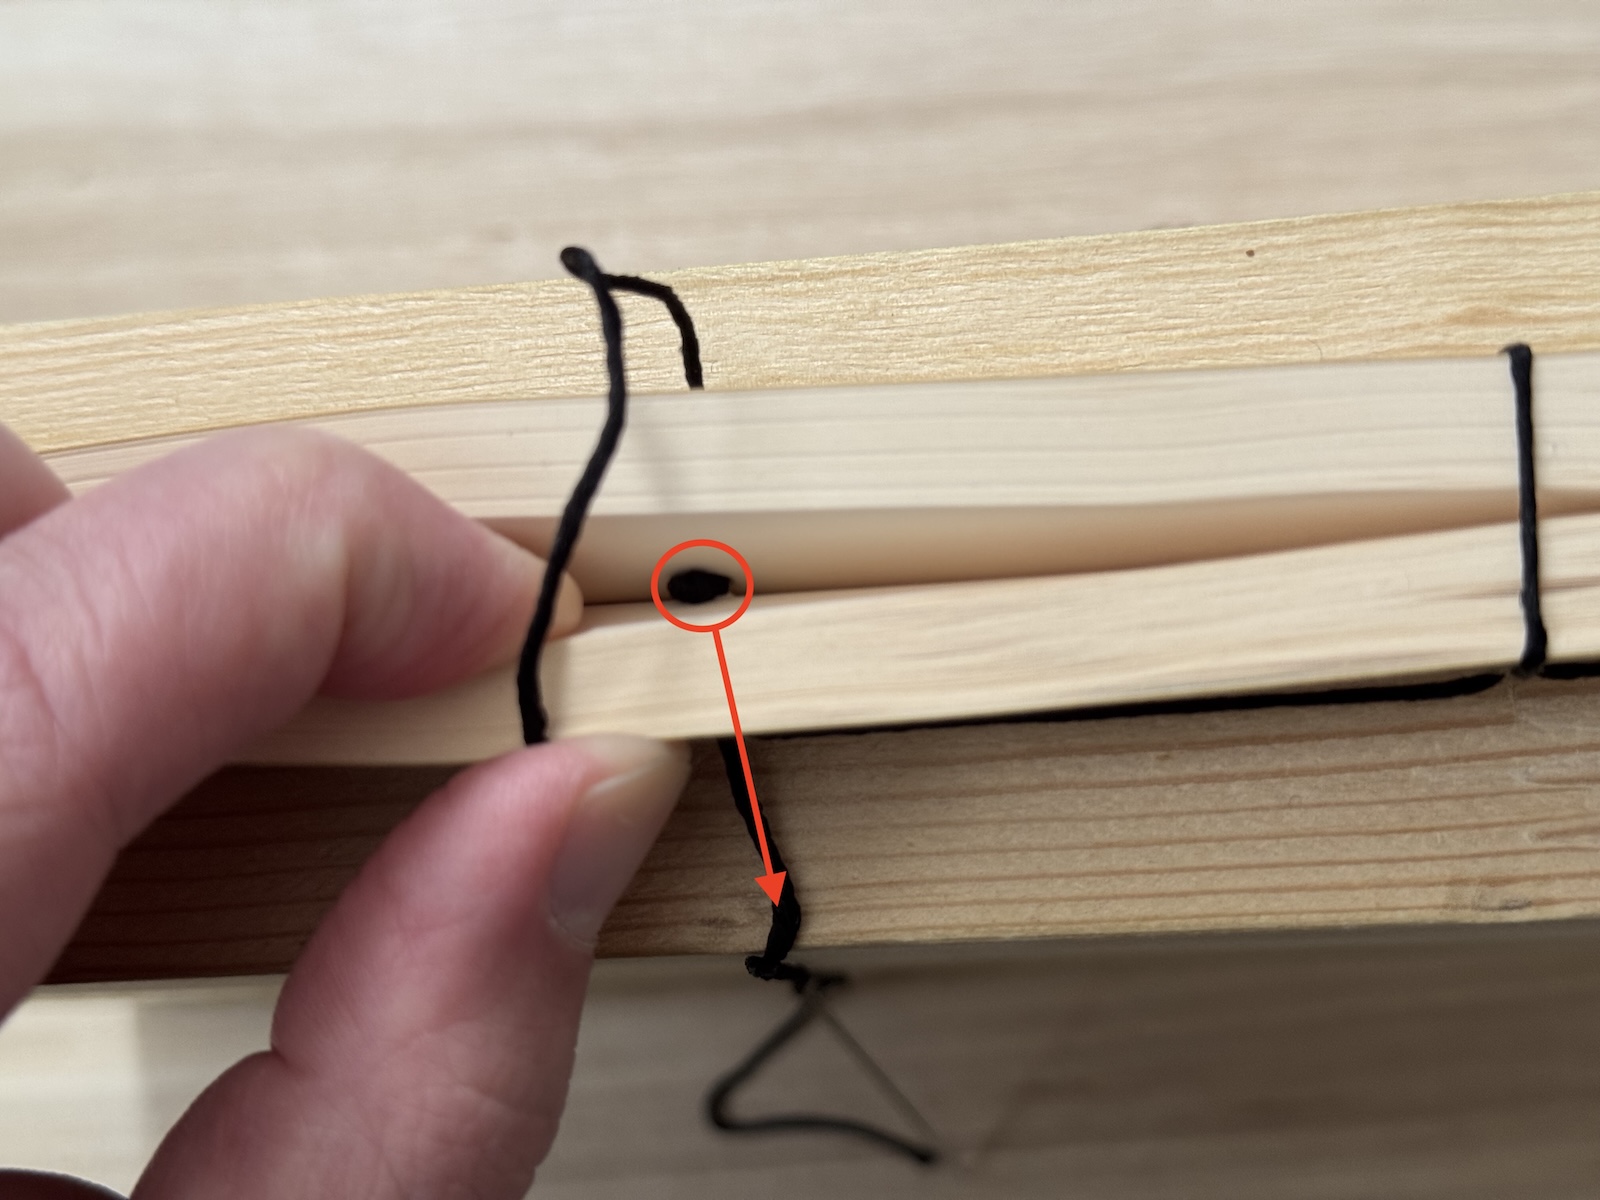
13) Then we tug on the thread to fit the knot inside the book. The idea is to have a knot that is as small as possible, but still big enough that it gets stuck at the hole inside the book. With my holes and type of thread, this has until now meant a quadruple knot, but when making this demo, for whatever reason, it was no longer enough and the knot went straight through. Here, then, I’m using a quintuple knot instead.
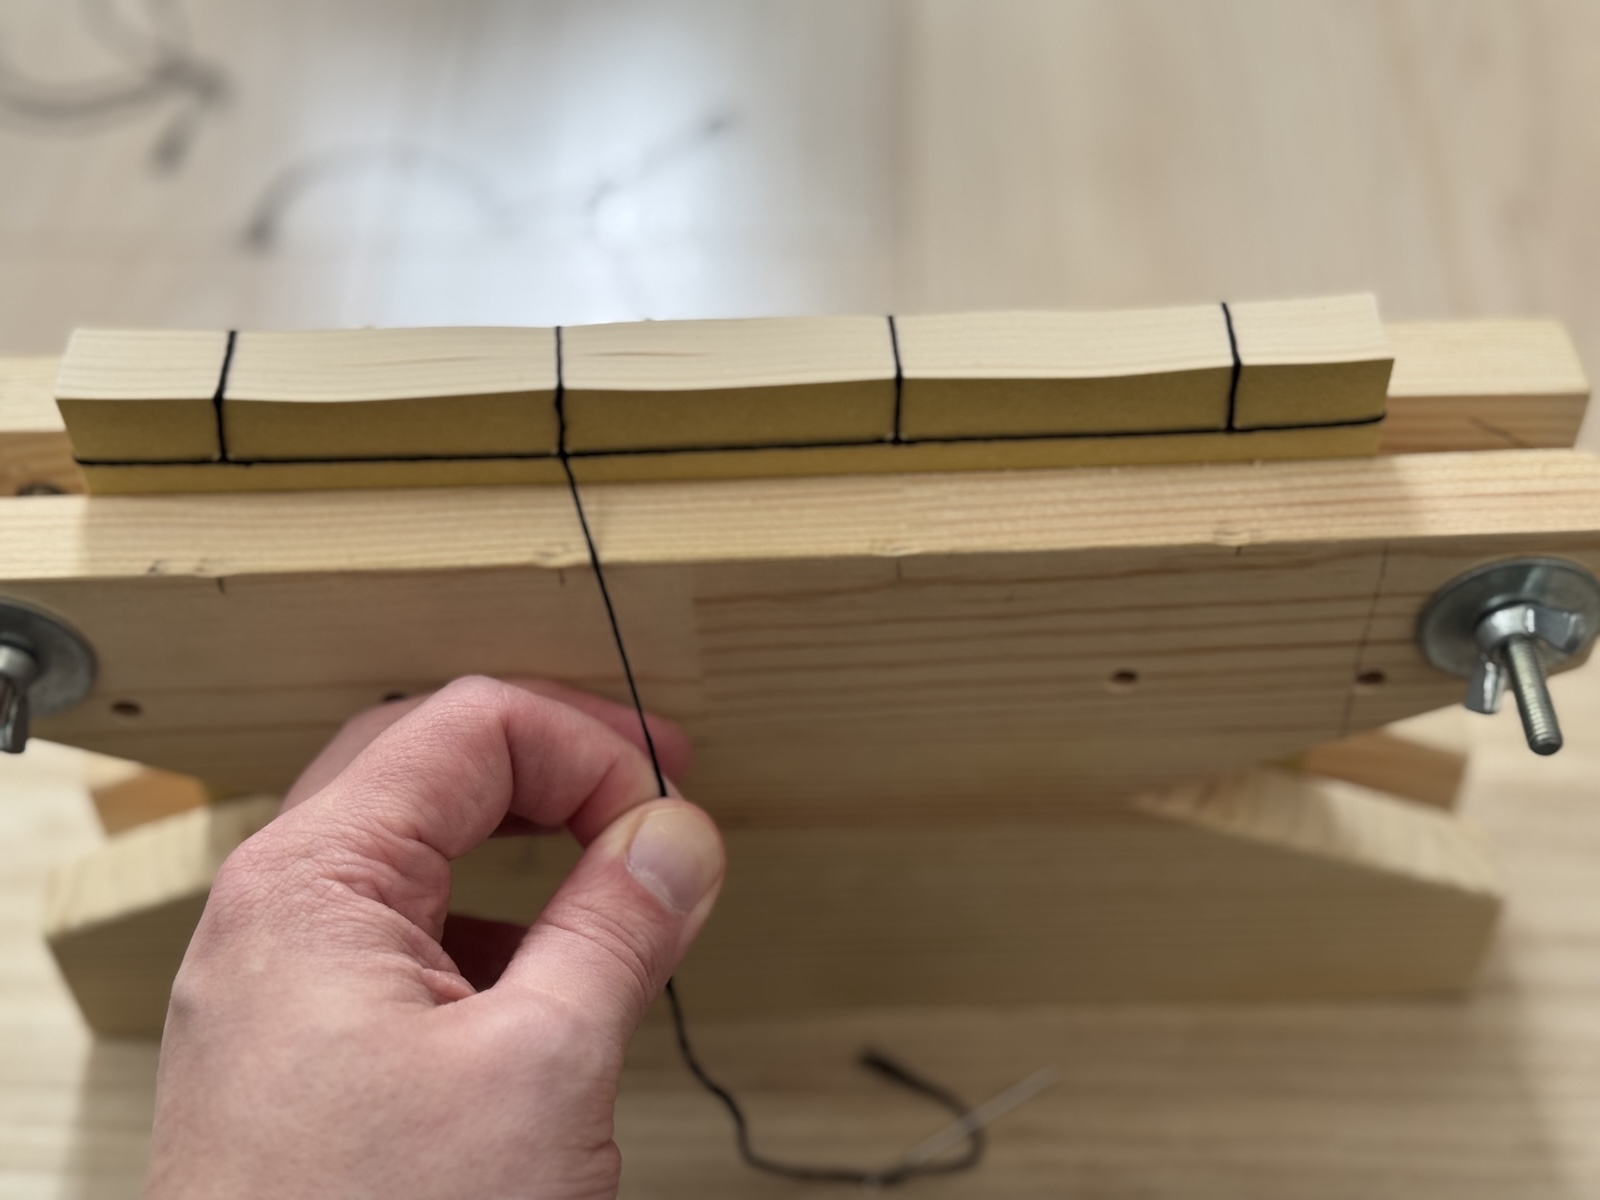
14) After the knot is in place, now it is time to completely tighten the book. Imagine pulling the thread from the knot, one loop at a time, until you’ve traversed to the other end where the needle is.
Strictly speaking, as for the end result, we want the thread to be a little loose to avoid unwanted structural pressure. However, there will be a later stage when the thread will unavoidably loosen up a little bit, so at this stage it doesn’t hurt to make the thread as tight as you can manage (but you don’t need to sweat it).
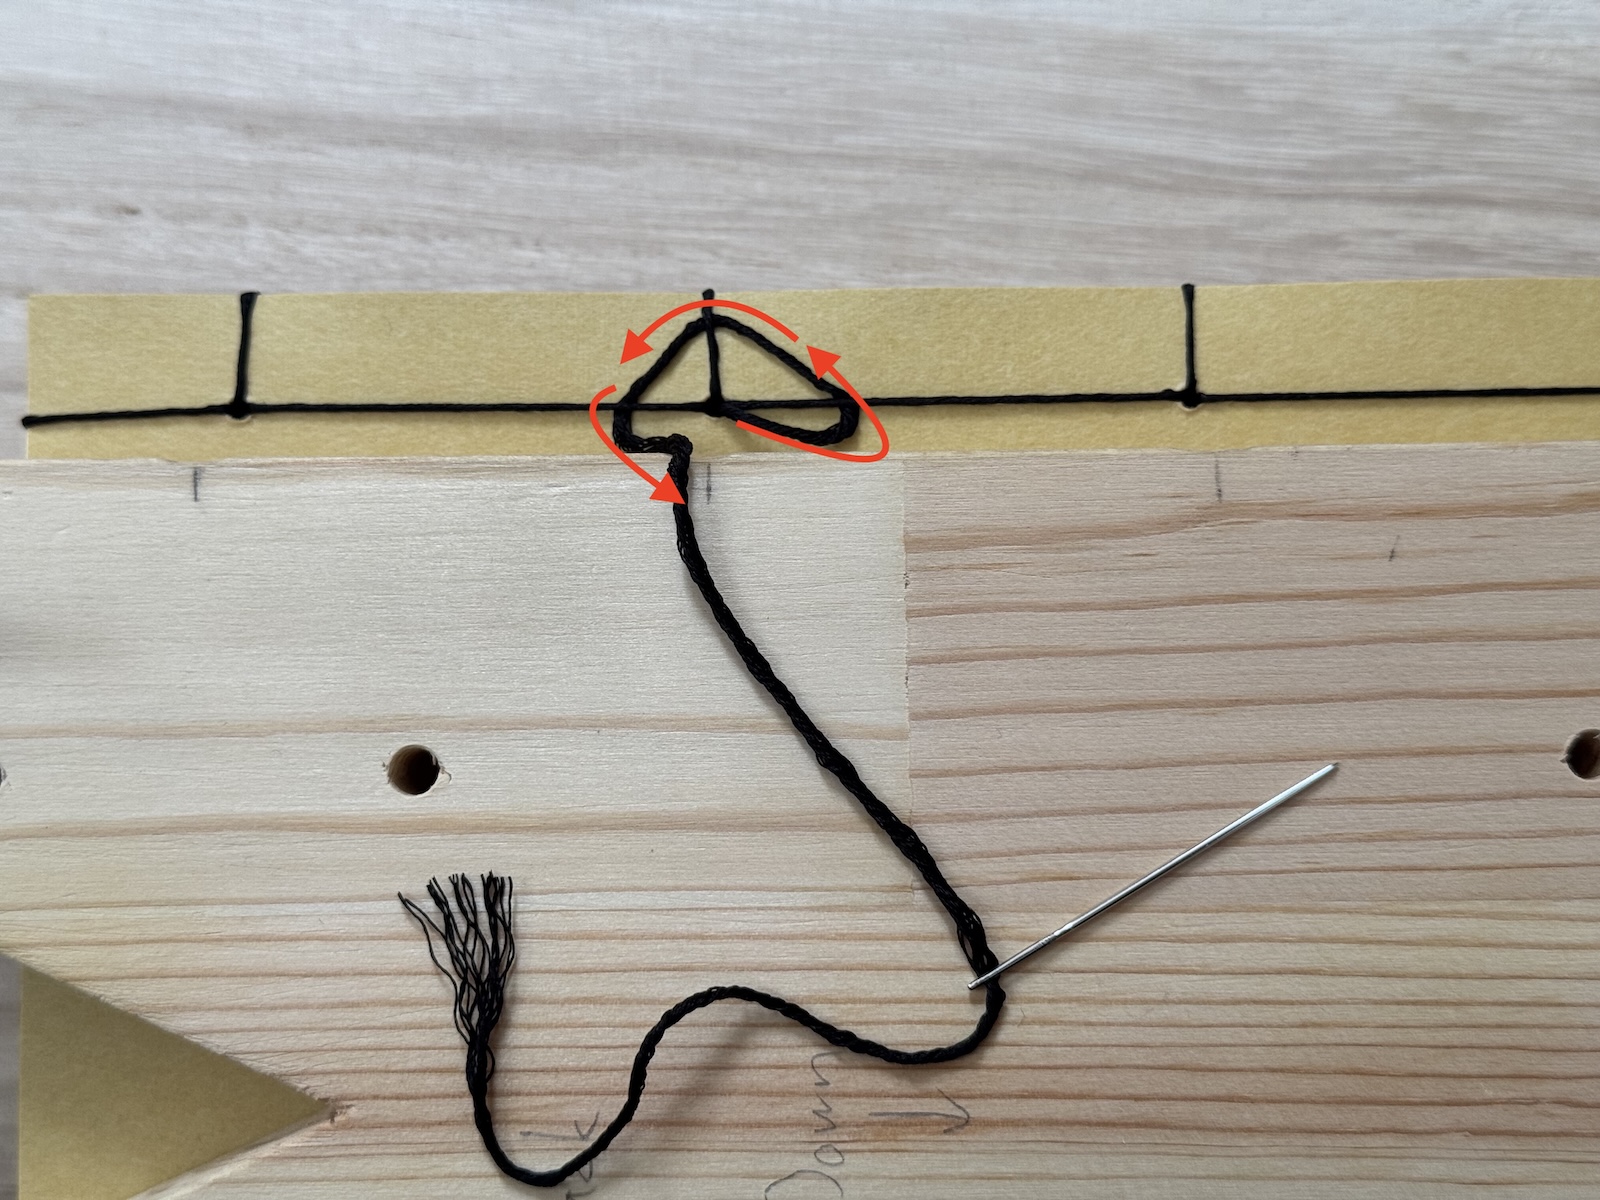
15) Next it is time to make the other finishing knot. Drive the needle under the three nearby strings of thread, as shown above.
I haven’t found documentation to confirm it, but I suspect that the size of the loop we have going for this knot will directly affect how much the thread loosens up later. I therefore try to make the loop as small as possible before I tighten the knot.
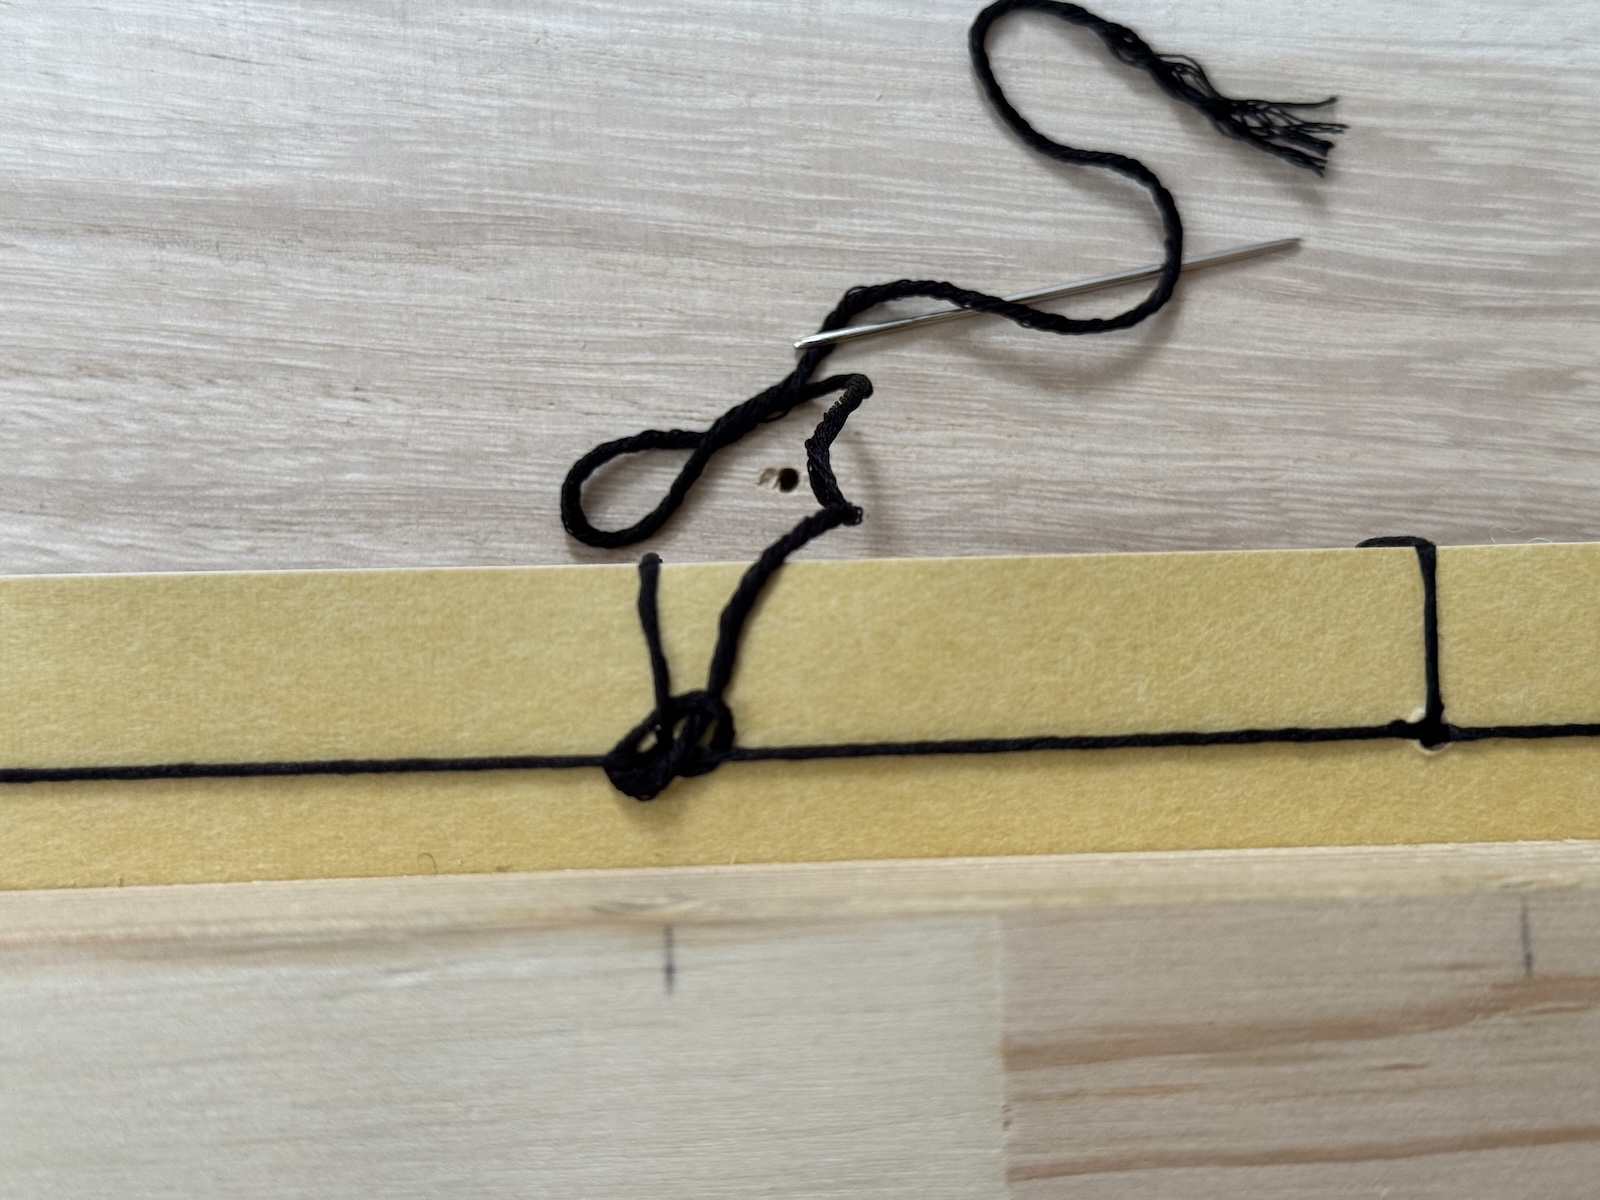
16) Next we make a knot by driving the needle through the upper-right corner loop.
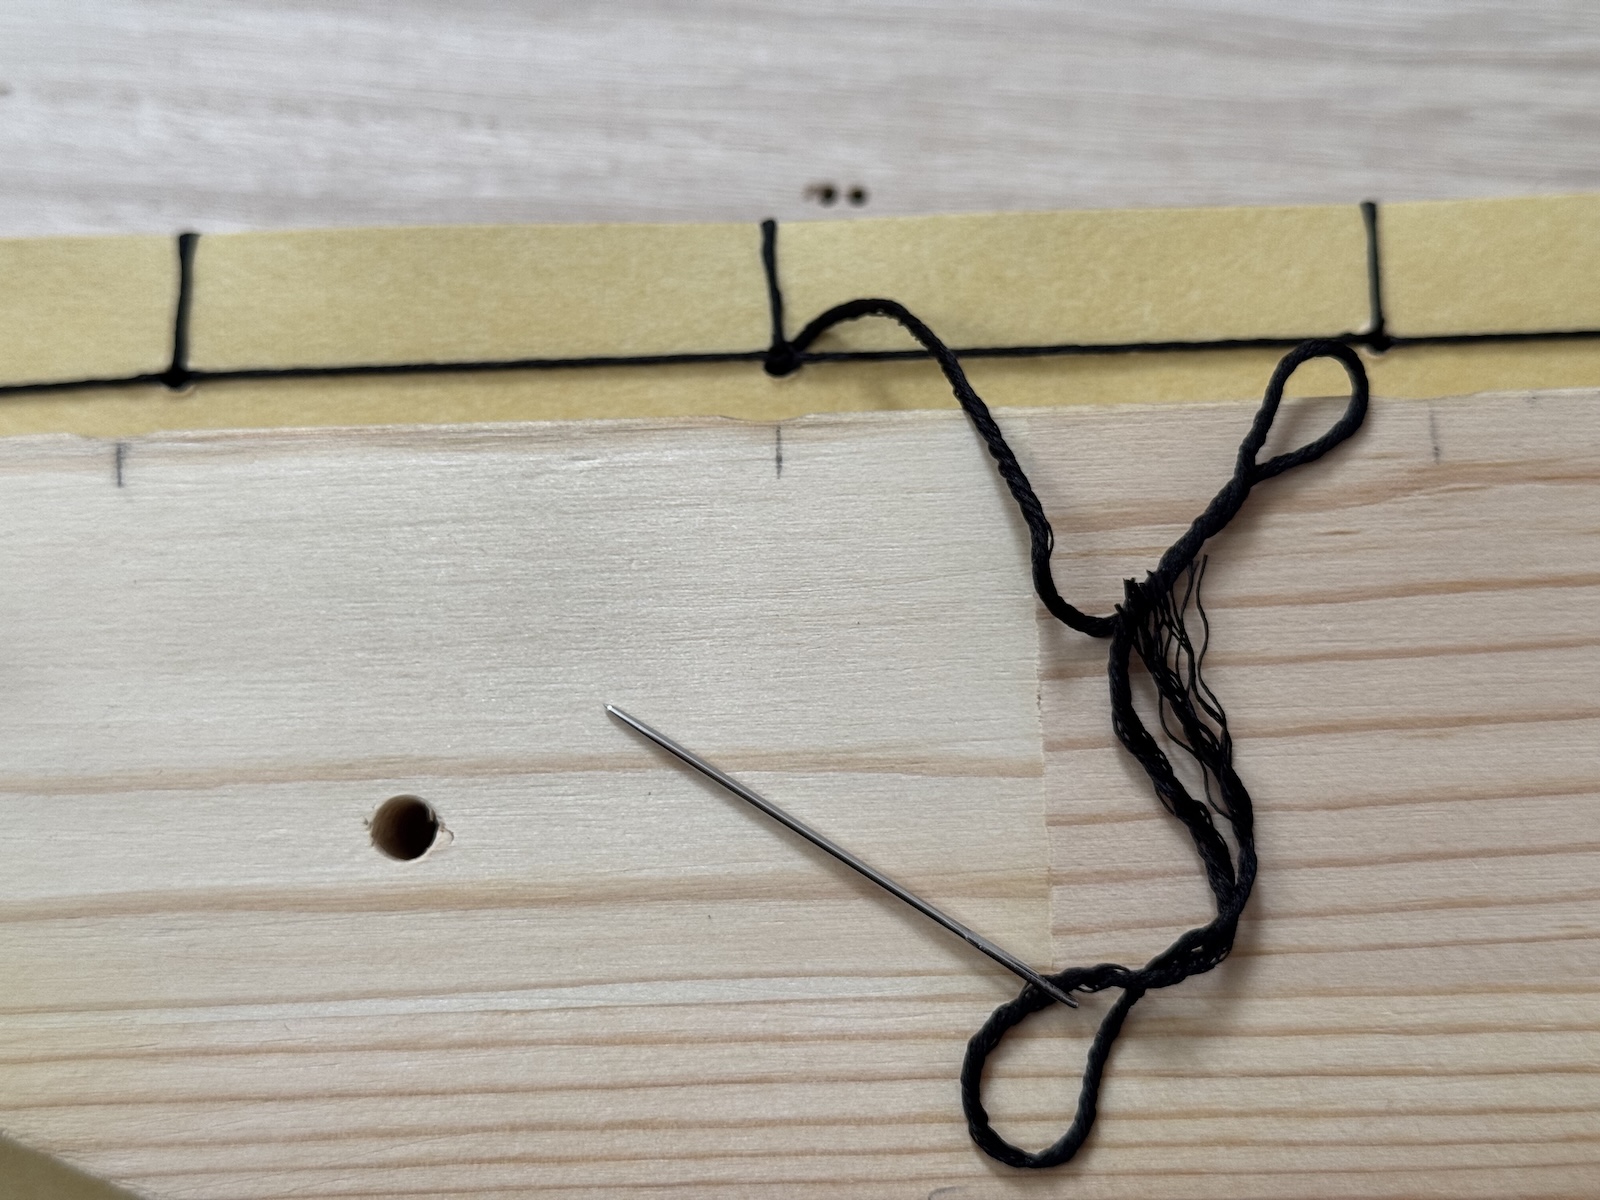
17) Finally, tug on the thread to tighten the knot.
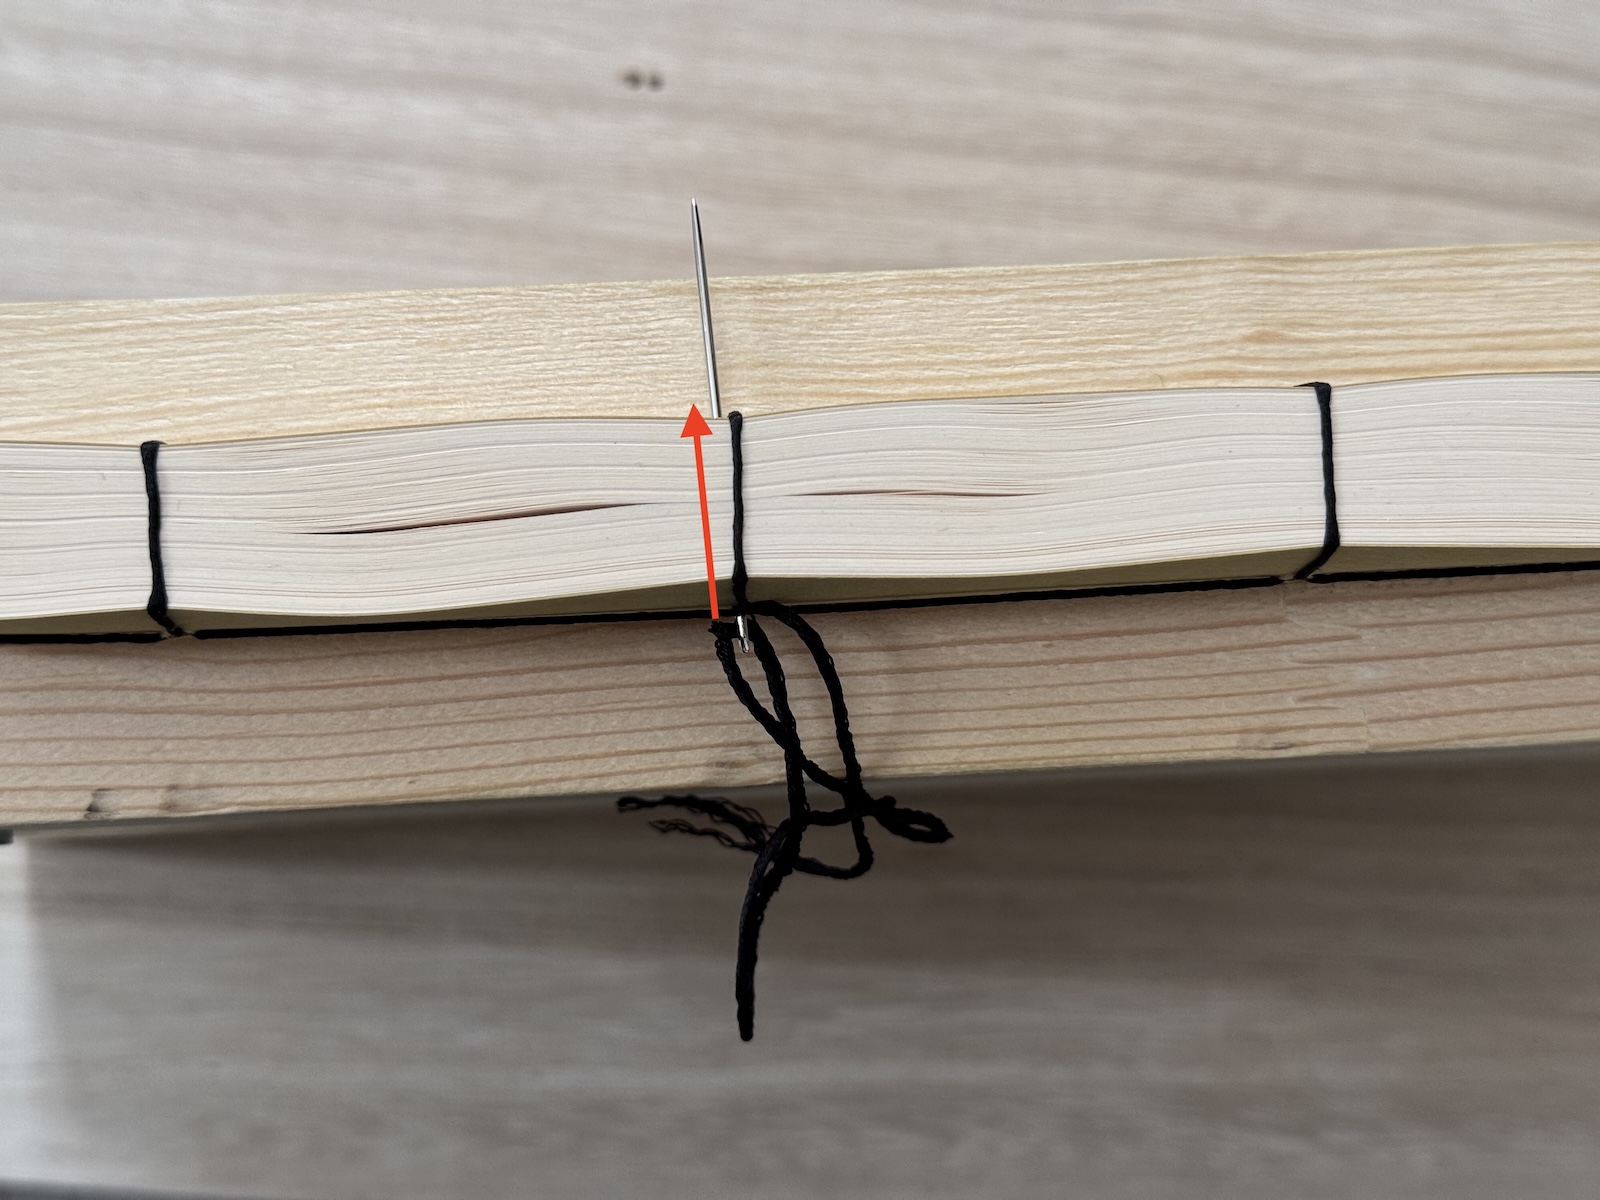
18) The last thing left is to also hide the second knot inside the book. So, we guide the needle through one more time. This is the only time when you don’t need to fuss about not getting the threads tangled up. For what it’s worth, it might actually be better for the durability of the binding.
This hole is rather crowded, and it can take some effort to get the needle through. I tend to use pliers if necessary.
There will be a satisfying tug to inform you that you have pulled the thread through all the way. This is a result of the knot disappearing inside the hole.
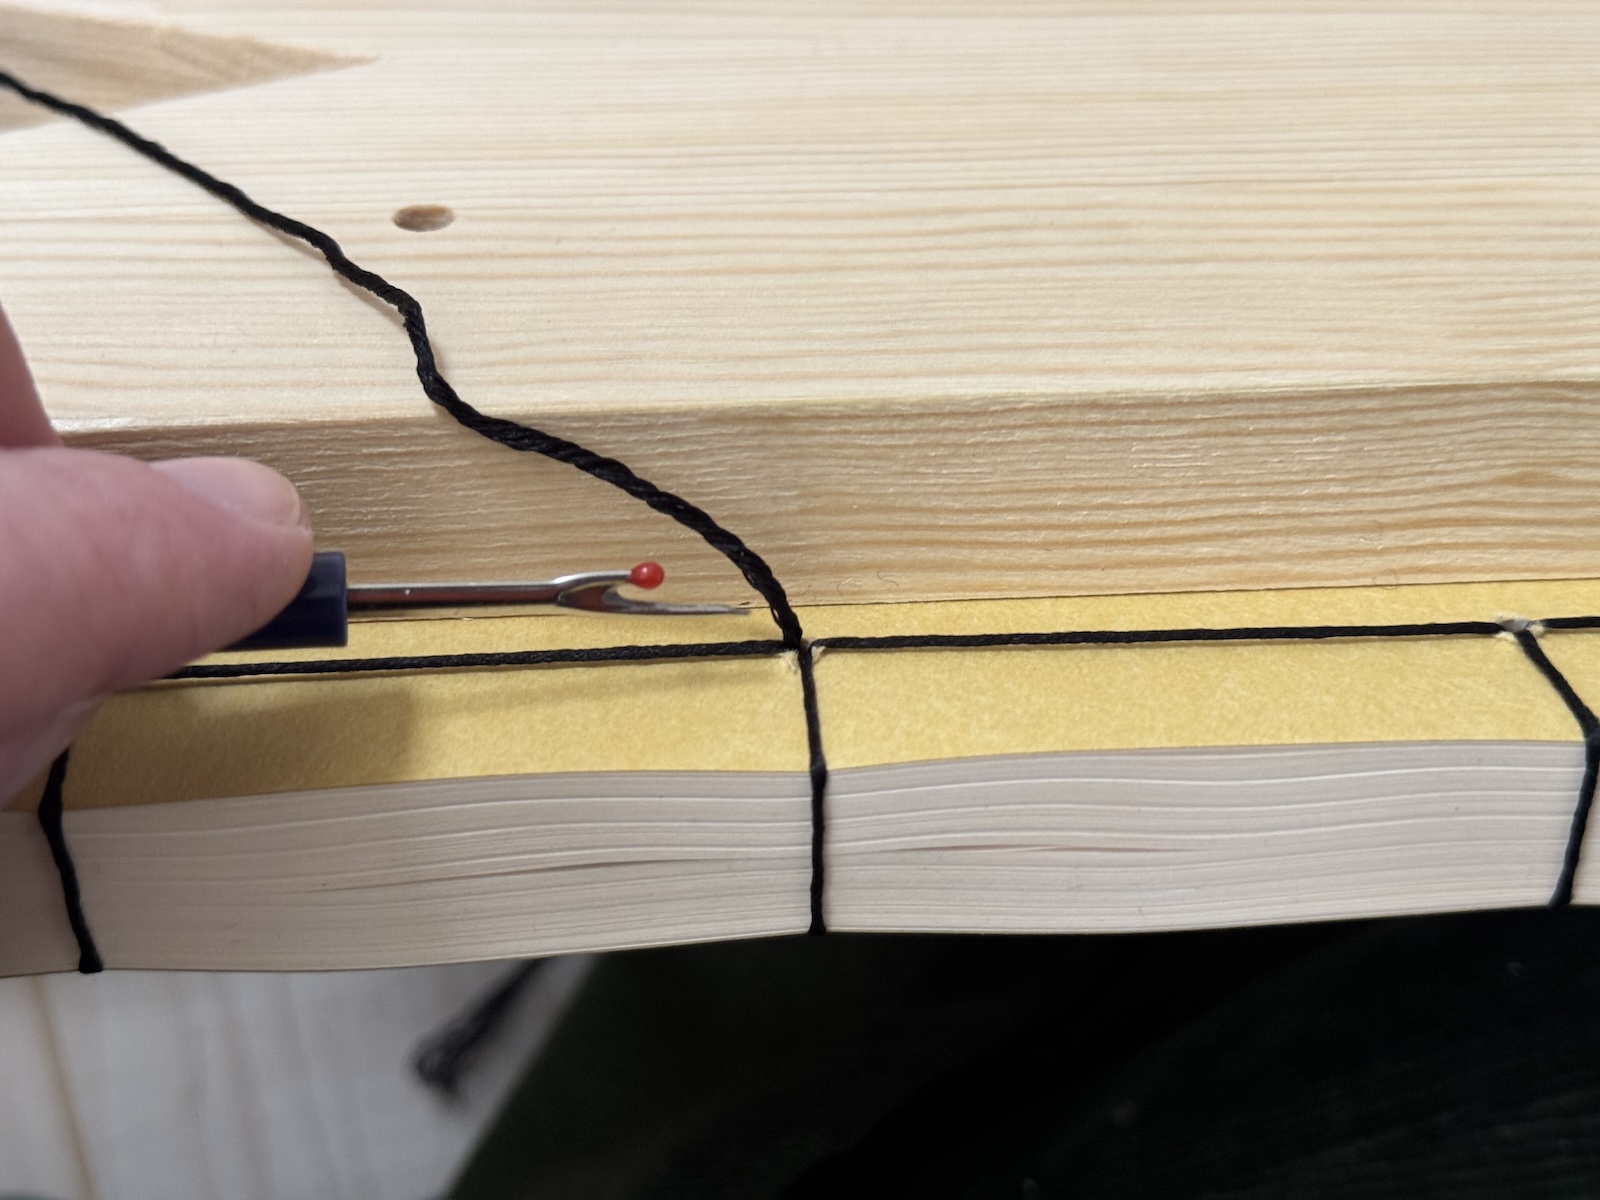
20) Next we cut the remaining thread as close to the book as possible. Scissors should work too, but I use the tool shown above.
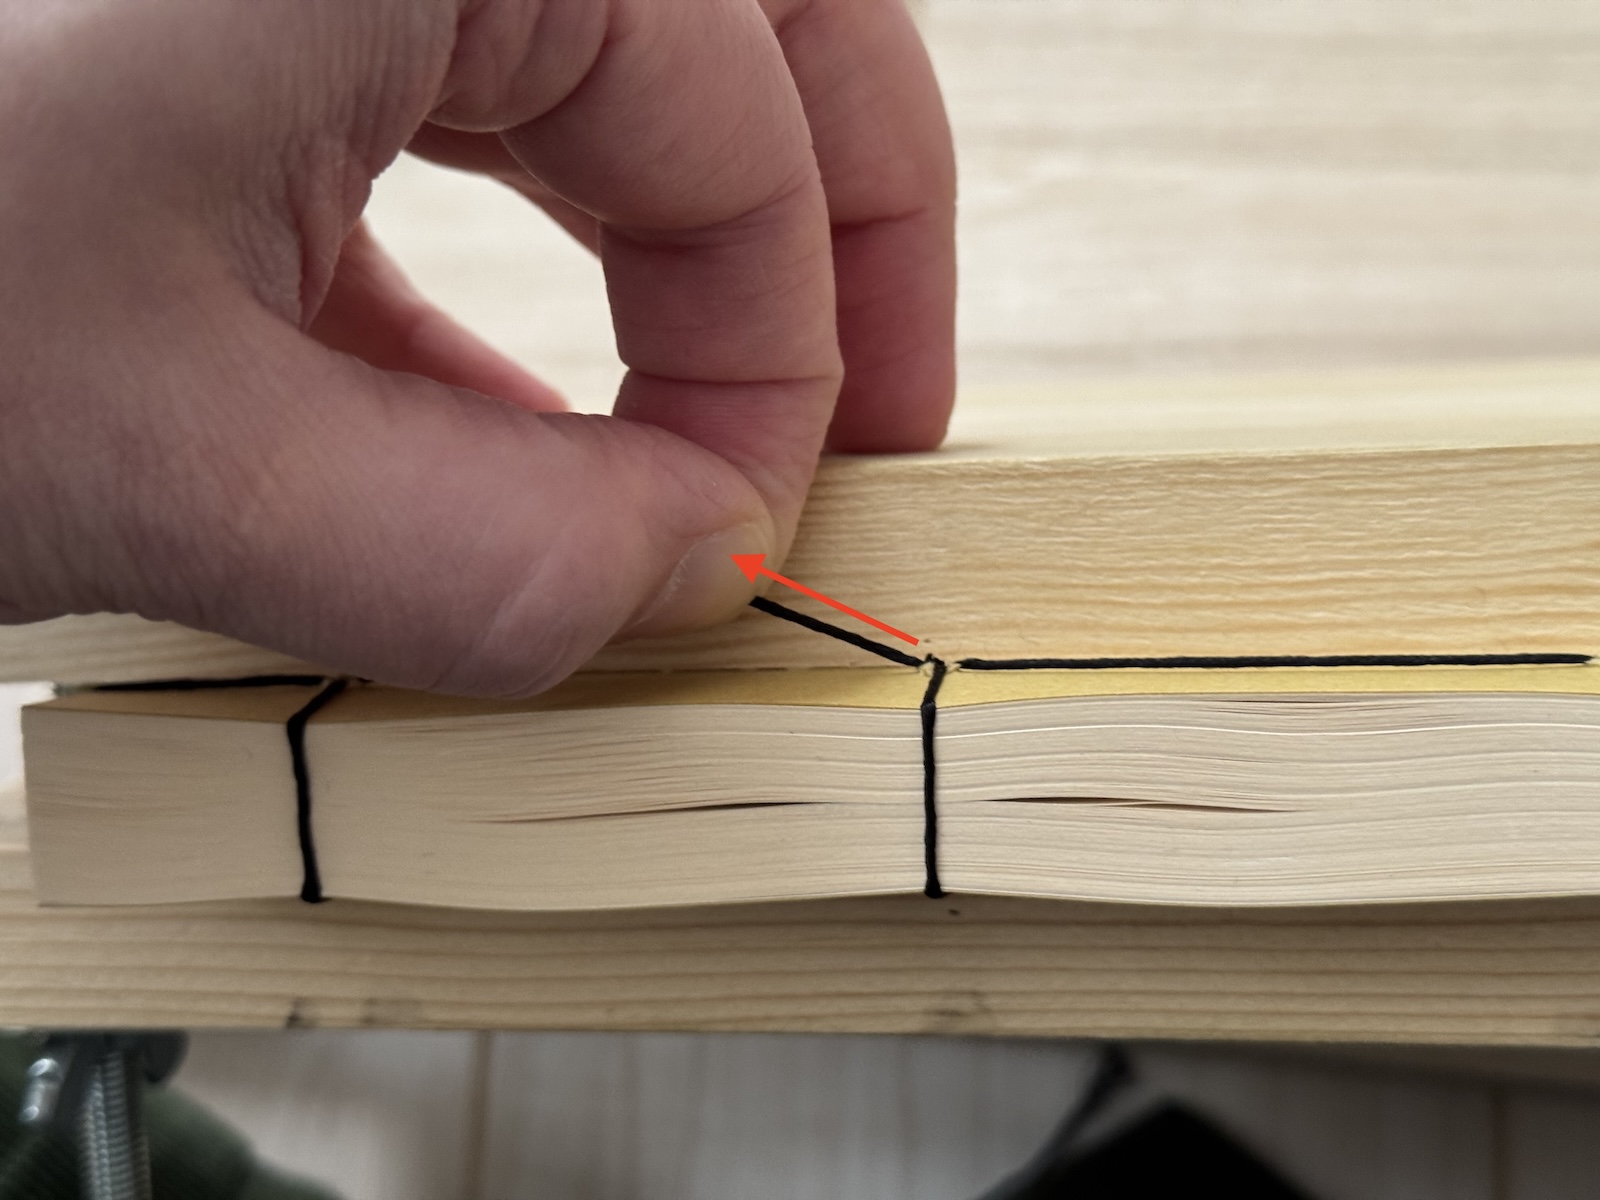
21) As a side result of the ‘satisfying tug’ in 18), we will now find that the thread on the other side has loosened up a bit. Our last job is to divide this ‘loose thread’ between all the loops of the binding.

22) When done distributing the extra thread, you should have something like this.
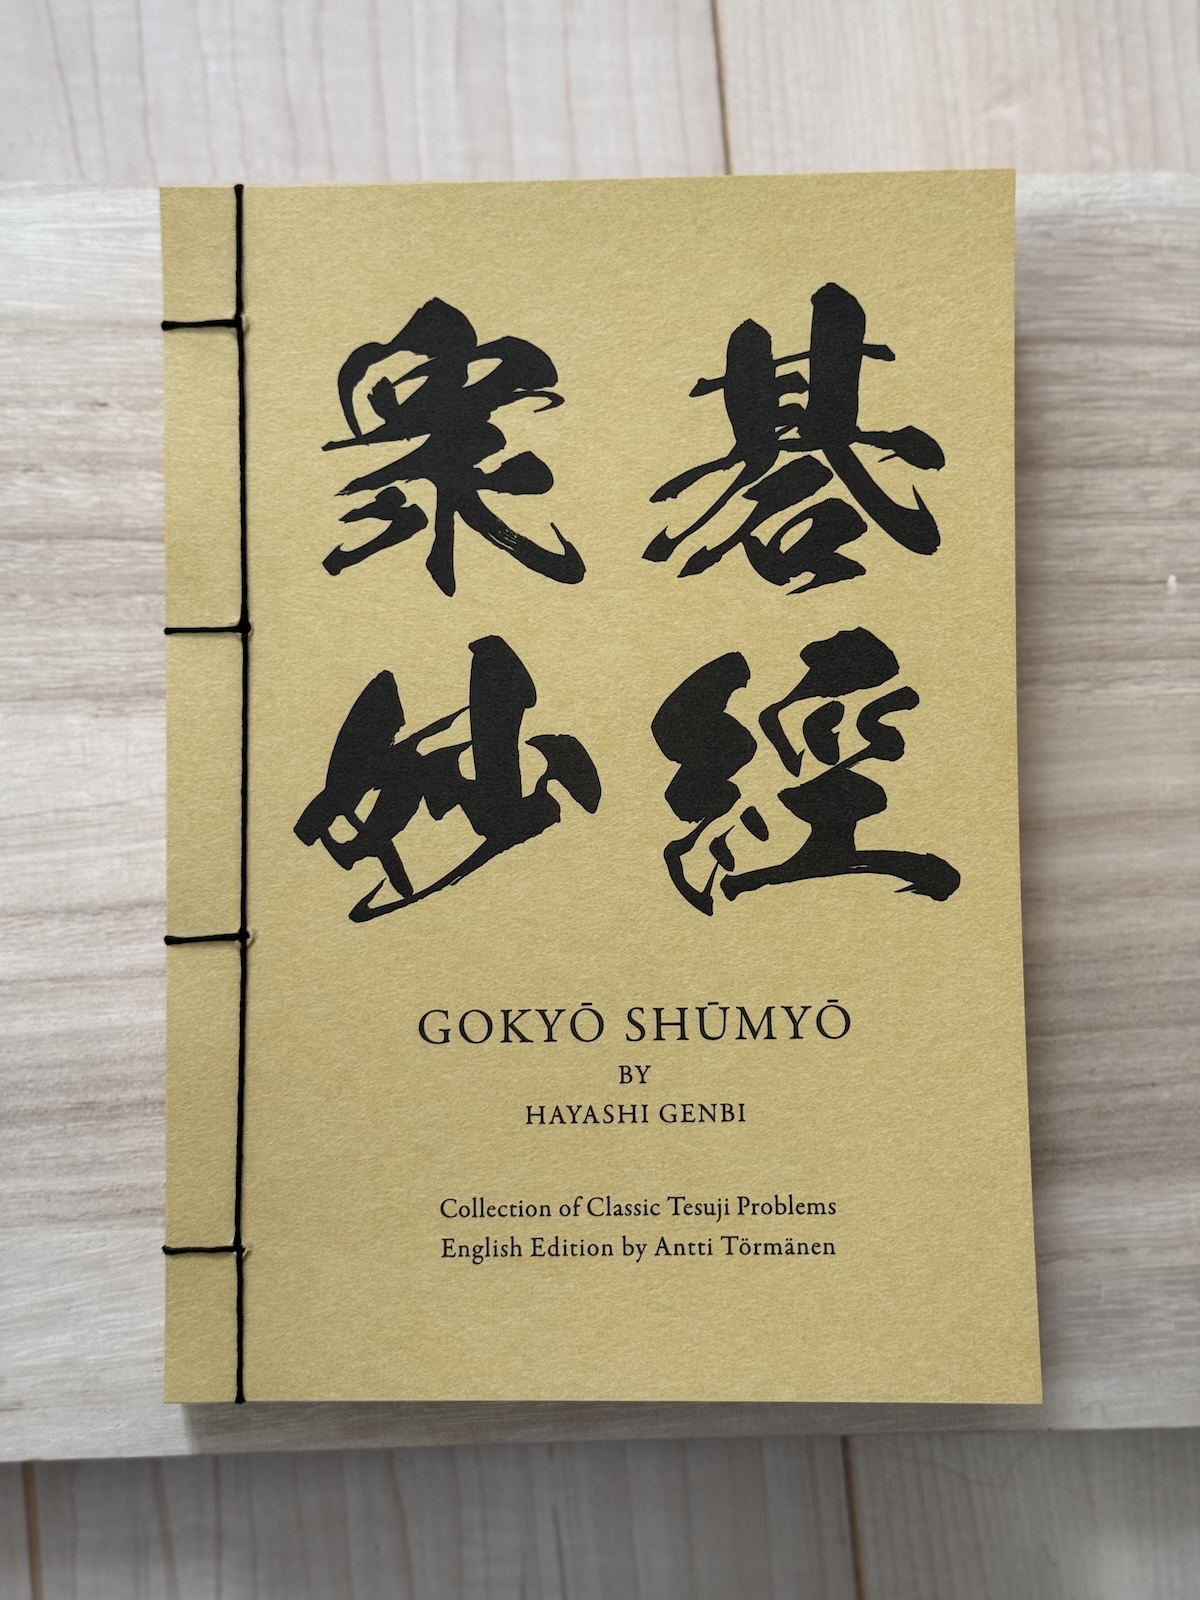
23) And here you have a perfectly bound Special Edition!
Lastly, for incoming orders:
- Price (including shipping) to the United States: 90€ (Sorry! The shipping just costs more, for whatever reason . . .)
- Price (including shipping) to elsewhere in the world: 80€
- Price for additional copies in one shipment: 70€
- Payment possible by European bank transfer or PayPal
- For orders, please send an email to nordicgodojo@gmail.com, supplying your name and address. I will reply to you with payment instructions.
Events
All times are in Helsinki time (eet with summer time).
Check the current review credits balance
Public lectures on Twitch every 2nd and 4th Saturday of the month at 1 pm.
Jeff and Mikko stream on Twitch on Fridays at 6 pm.


